Nuffnang Leaderboard AD

Showing posts with label tutorial. Show all posts

Monday, December 14, 2015

Shopee PH Review - How to Order

I've been using Shopee PH for a while now. Found out about the app through one of the Fb pages I follow: GWYSHOP. This post would be a general "How To" guide on how to use the service. If you want to just dive in and try out the app yourself, download the app: HERE.
How to Shop:

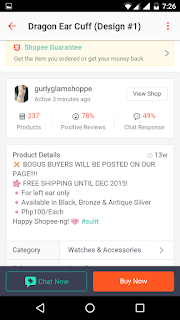
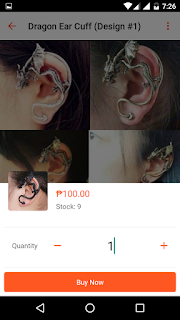
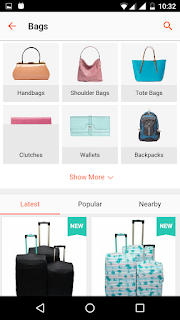
Browse the Shopee Mall and choose an item for sale

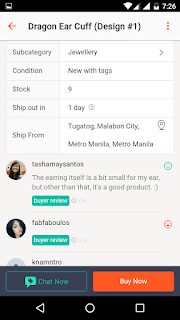
Info about the seller and the item are provided on the item's page.

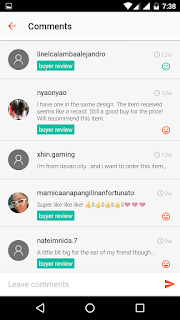
You can also see comments posted by other buyers and the seller's replies.

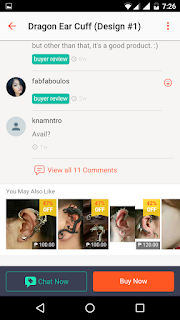
Shopee also lists similar items on the bottom of the page which are not necessarily from the same seller.
View all comments
When you click "Buy Now" you only choose the quantity of the item.

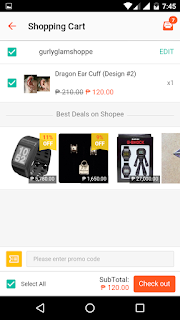
Checkout page. Here is also where you should apply discount codes.

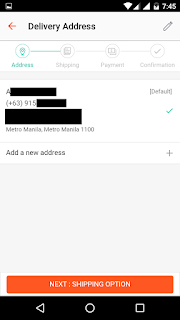
Finalize chekout: Address, Shipping, Payment, Confirmation

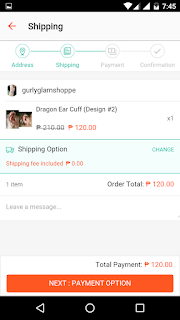
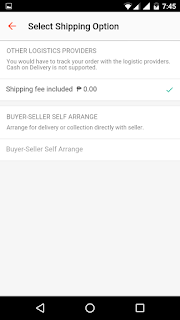
Shipping

If the seller doesn't offer free shipping, this is where you choose the shipping method you prefer.

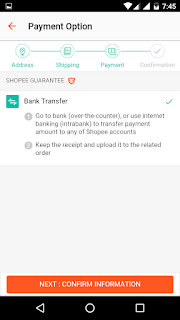
Payment method.
If you're familiar with Dragonpay. Buying from Shopee is similar. I personally used the BPI app to pay for my orders. Take note that it takes 1-2 days to process and confirm your payment. For me it almost always took 2 days.
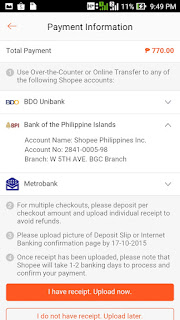
Here's a sample from one of my orders. If you pay through the BPI or Metrobank app, you can send a screenshot instead.
Once you pay for your order, the seller has a set number of days to ship your item. This will vary per order and will be indicated in the order details. When you receive your order you will have to go to the "To Receive" tab and confirm the receipt of your item so that Shopee can release your payment to the seller.
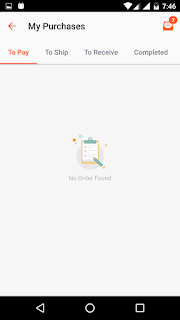
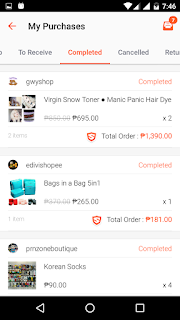
Under the Me tab, if you click on My Purchases you can track your orders which are conveniently categorized into To Pay, To Ship, To Receive, Completed, Cancelled, and Return / Refund.

Here's what my Completed tab looks  

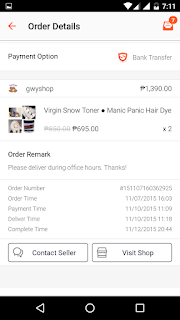
Shopee keeps detailed info on every single order. You can see when I ordered, payment time, delivery time and completion times.

Aaand that's all there is to it!

PROs and CONs

+Since I registered a couple of months ago, more and more of the local Fb shops I follow are registering on Shopee.
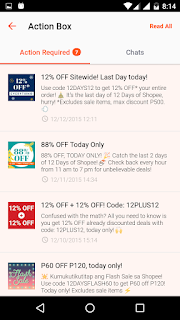
Use all the codes! (jk you obvs just use one at a time)
+Because Shopee is generous when it comes to giving out discount codes. Most of the shops I follow post their items on Shopee for around 10-20% less compared to their prices on their Fb shops! WHAT SAVINGS!


+That, coupled with the Shopee Guarantee is a win-win for both buyers and sellers. What is the Shopee Guarantee?

Shopee protects you by holding your payment until you confirm that you have received your goods. The payment is then released to the seller. 

That's definitely something that Fb shops cannot offer. For more details, please read the FAQ HERE.

+Like most e-shopping apps, Shopee has a website. As a buyer, you can browse the Shopee Mall. As a seller, you can go to the Seller Centre. I haven't tried using the website version of Shoppe so I can't give you feedback about it. If you try it though, please share your experience in the comments section below!

-Faulty Notifications
It seems that the app doesn't have push notifications. You only receive a notification about unread messages when you open the app. After several updates since I ordered, it's still broken!
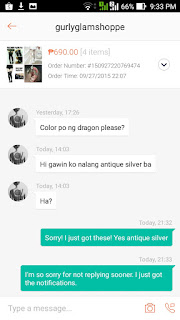
I didn't receive the notification until I opened up the app!

-If you noticed above, when you click Buy Now, you can only choose the quantity of the item. There's still no system for the buyer to choose what color/design/size to buy.

TIP: While the app indicates how many items the seller has in stock, you should make it a habit to confirm with the seller first before ordering.

-No Categories available when viewing individual shops. The only sorting used is that the Out of Stock items are at the end of the page. Other than that, there's no way to filter or sort the seller's items.
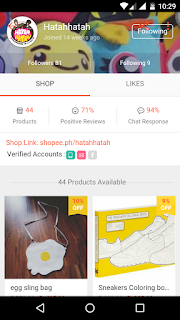
The seller's page lists all items without categories.

Compared to when you browse the Shopee Mall:
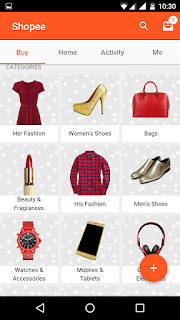
Basic Categories

Extended categories page
Shopee replies to some reviews posted on it's Play Store page. They are claiming they're working on these issues. I hope so, but I'm not holding my breath. At least I can confirm that it works on Android's Marshmallow update! Unlike other apps... *cough

Overall, Shopee is a solid app and all of my Fb stores should be on it! ;p The Shopee Guarantee saves me the trouble of setting up a meetup, and/or the anxiety of wondering if I'll ever receive my items or if the seller ran away with my hard-earned money!

This might be first of my Shopee entries. I have a few purchases that I could post a review of. 'Til next time!

Have you tried Shopee yet? What's your favorite shop? Post your comments and suggestions below!


Friday, August 07, 2015

How to Enter Negative Values on the eBIRforms v5.0 [Tutorial]

Update 09/15/2015: eBIRforms version 5.1 is live! Download it here: http://ftp.pregi.net/bir/ebirforms_package_v5.1.zip

I've spent the better part of last weekend finding a way to enter negative values on BIR's eBIRforms and found no solutions posted online. Trying to input a number with the - minus sign, or the ) parentheses is simply not possible! I tried calling the BIR Hotline, but concerns regarding eFPS and eBIRforms can only be answered during regular business hours. I had no choice but to wait until then to call. I wasn't surprised that I was put on hold for almost half an hour before my call was even answered. To save you all that trouble, I'm writing this tutorial on how to input negative numbers on the eBIRforms v5.0.

Before we proceed, the disclaimers: I am not affiliated with the BIR nor am I a CPA. So I'm afraid I won't be of any help should you have other questions about eBIRforms. You are however still welcome to post in the comment section below, and let's hope someone would be able to provide an answer to your inquiry.

Moving on, first you need latest version of eBIRforms as of writing, that would be version 5.0. Download it HERE

Always make sure you're using the latest version of eBIRforms
STEPS:

  1. Open a word processor program. (Doesn't matter what program you use, you just need to be able to type the negative value you want to insert into the form).
  2. Enter the value with the - minus sign. (Do not use commas!)
  3. Copy the text. (Cut will work too, but with copy you don't have to retype the entire thing if something goes awry.)
  4. Paste the text onto the cell. Use CTRL+V. (Right clicking will not work!)
Below is a visual tutorial. Click photos to embiggen.

NOTE: I'll be using Item 35 of the 1701Q form. Since that's the form and the cell that I needed to input negative values in.

Here are samples of word processor programs that I tested this method on:


Google Docs
Notepad
Sticky Notes
This is how it would look like when you copy the negative value into the form:
Remember to use CTRL+V
Once you click outside of the cell, eBIRforms would automatically add the comma (if applicable) and perform proper the computations.
Negative value entered!
!!REMINDER!!
BIR Form 1701Q is due on the 15th of August!

Now you know how to enter negative values on the eBIRformsThat's all there is to it! It's a damn shame that I had to wait days before I was able to find out the solution to this issue. I hope the next version of the eBIRforms would enable taxpayers to input negative values without needing to resort to any workarounds. 

Please feel free to share this post. Please leave a comment below if it this post helped you. Thank you!

BIR CONTACT CENTER
Telephone: (02) 981 8888
Email: contact_us@cctr.bir.gov.ph 

Saturday, November 15, 2014

How to Enable Developer Options for Android Jellybean (ex: Cherry Mobile Flare HD) and Android Kitkat (ex: Asus Zenfone)

Google's Android 4.2 update comes without Developer Options disabled. If you need it enabled, keep reading! I'm going to keep this short and sweet (but image heavy)!

How to enable Developer options on an Android Jellybean (done on my Cherry Mobile Flare HD):

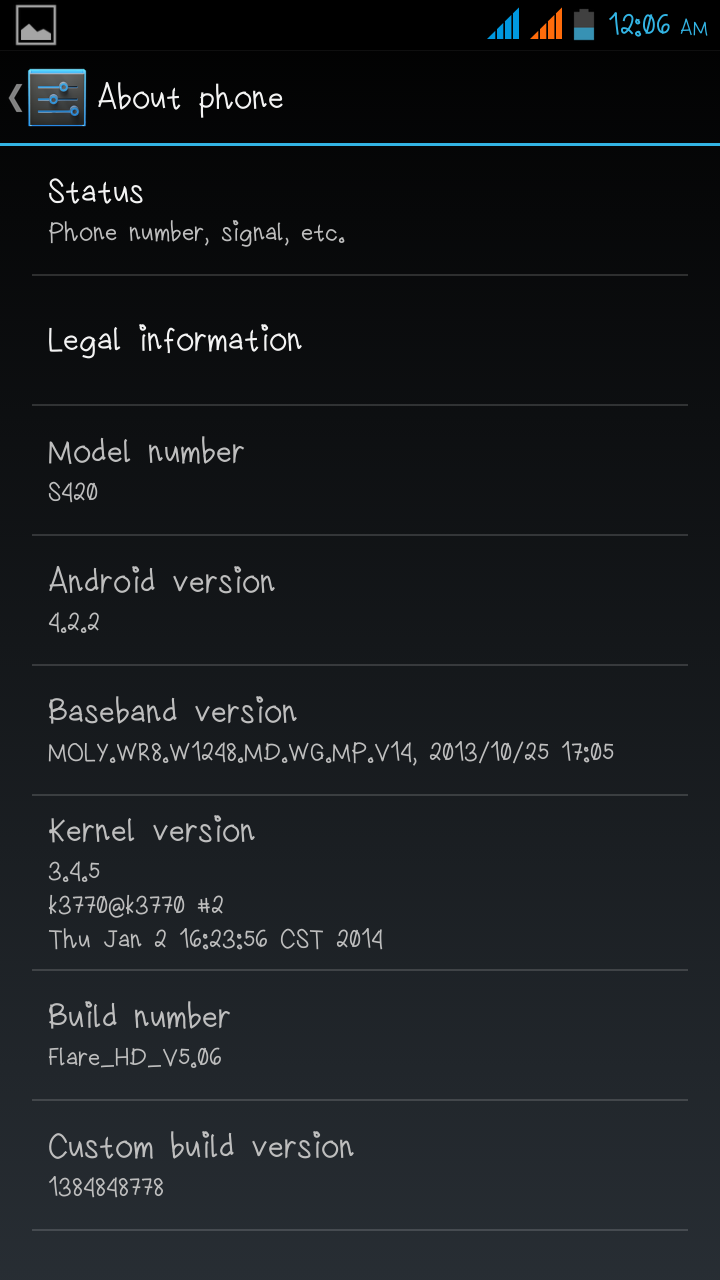
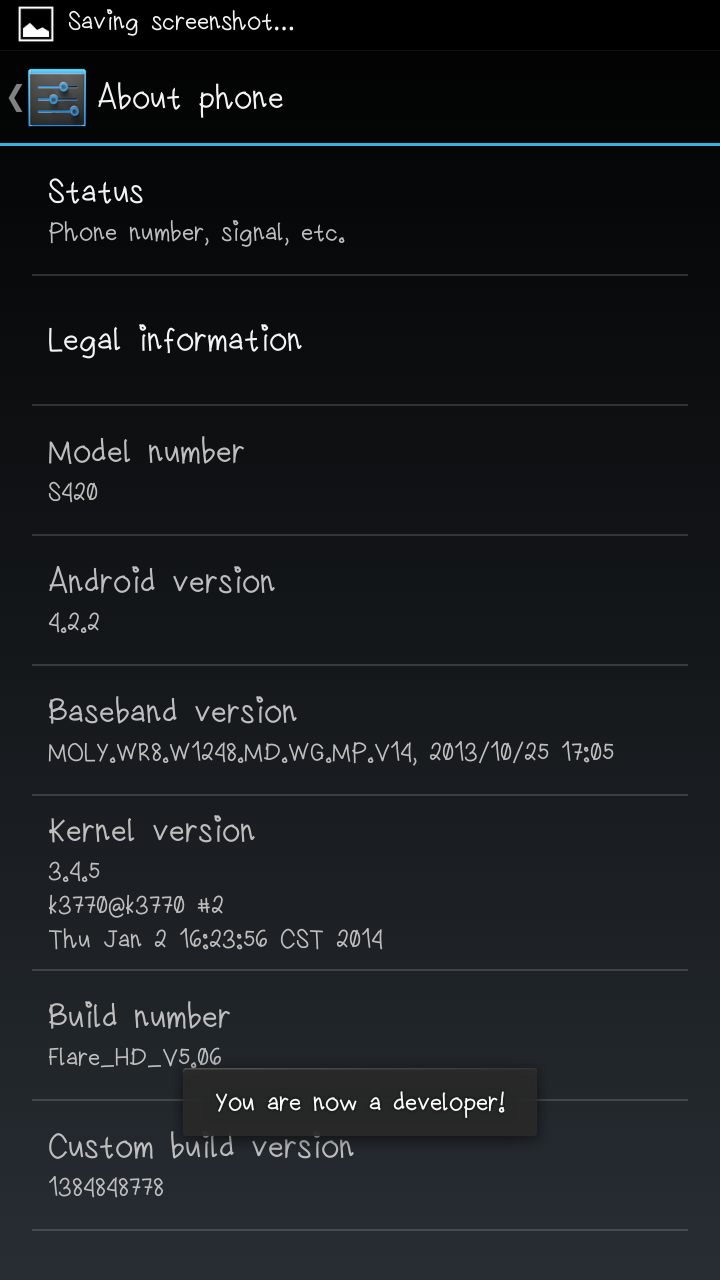
Go to Settings > About phone

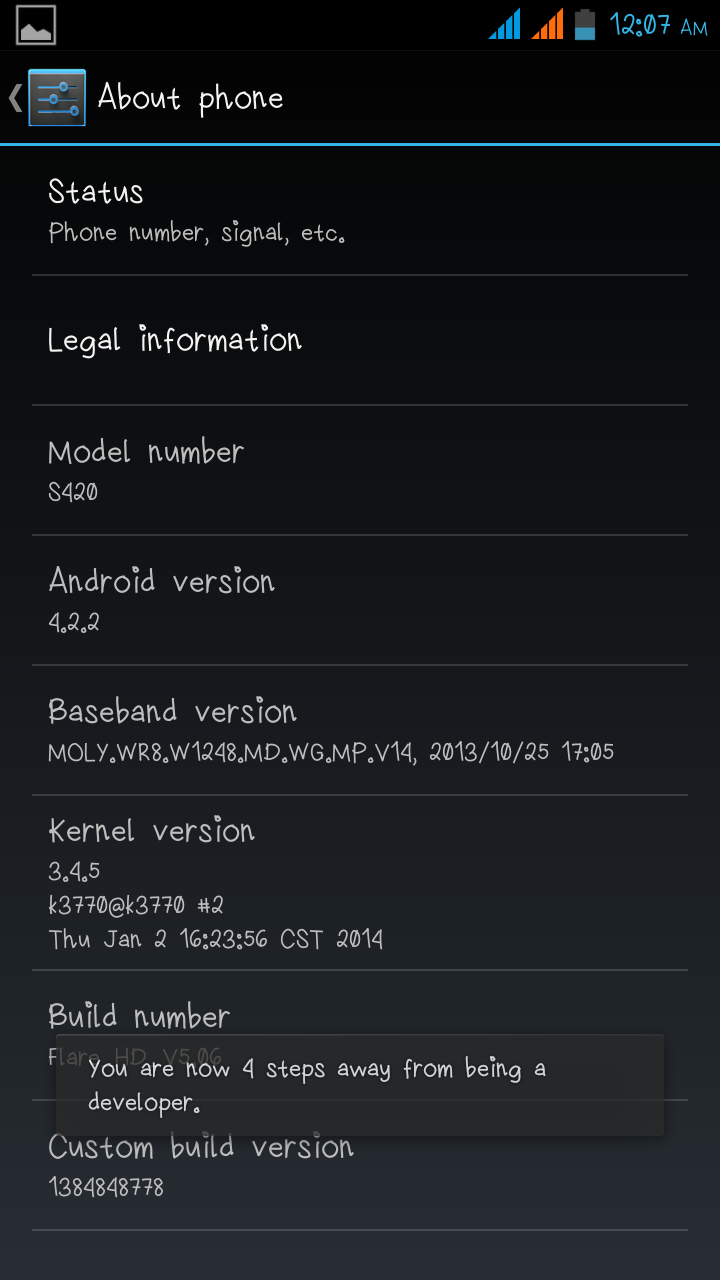
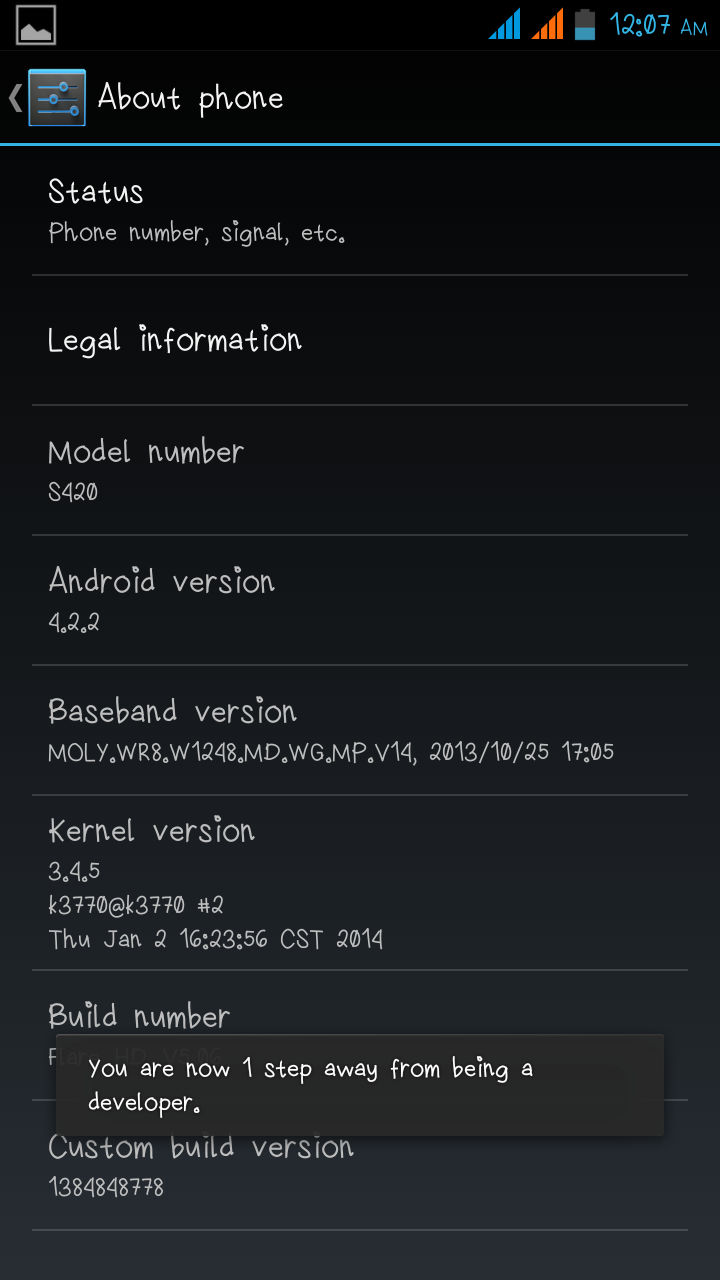
Tap on the Build number 7 times

Yes 7 times!

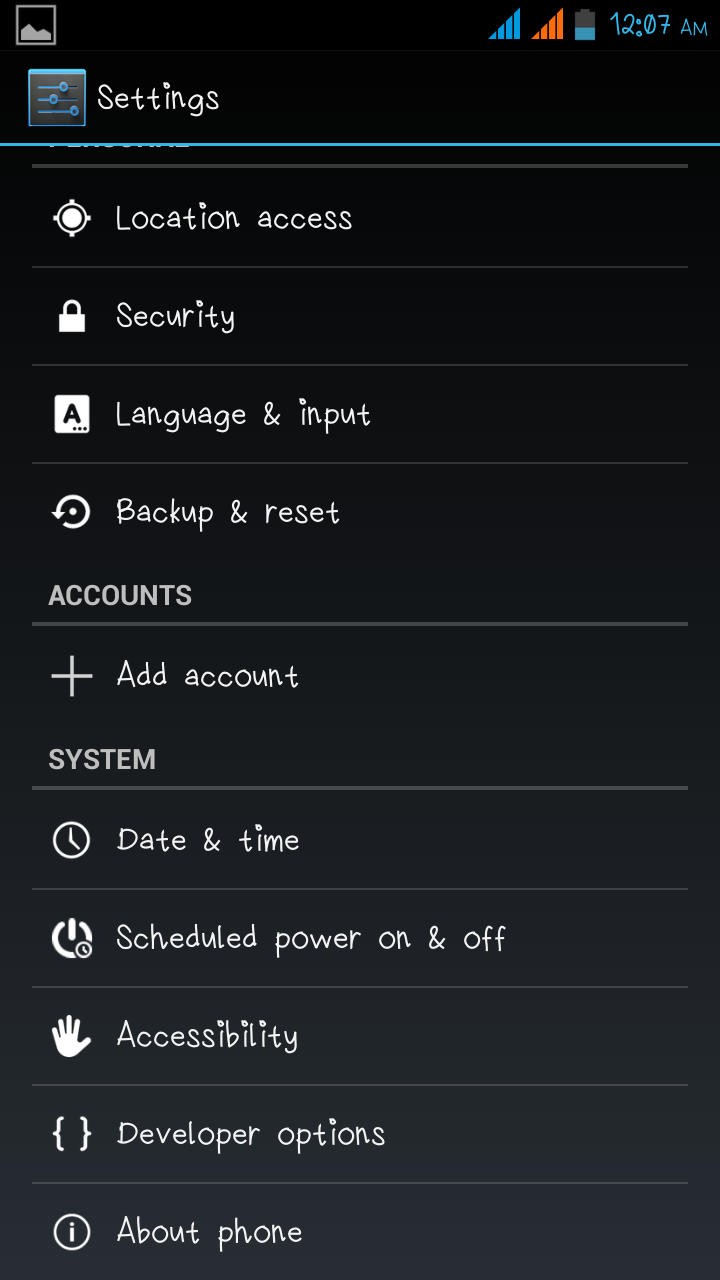
Developer Options enabled!
Developer options now visible under Settings > System 

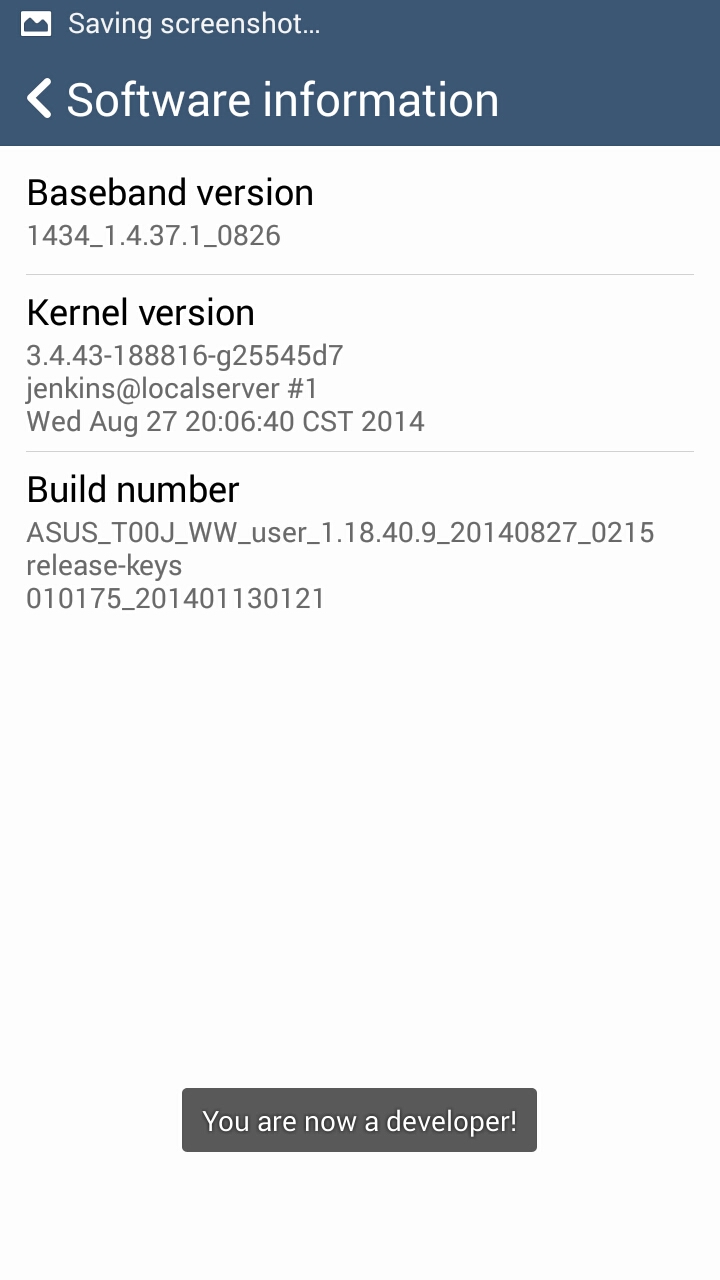
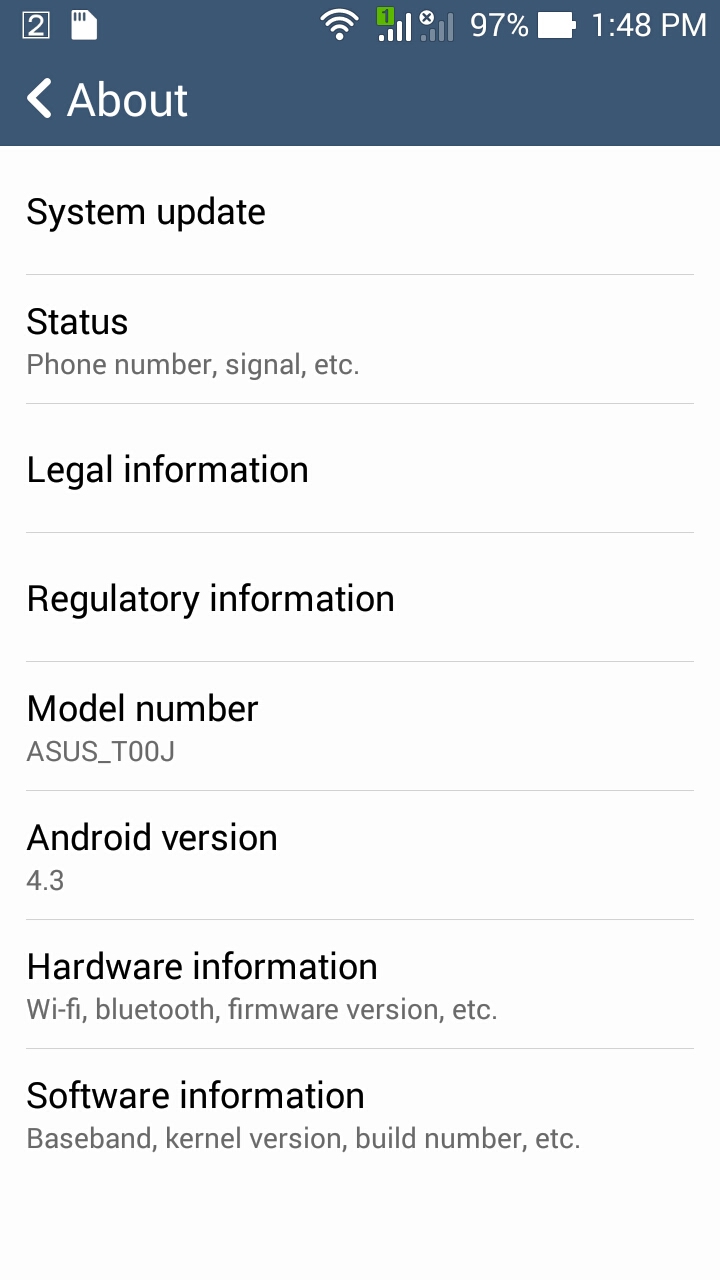
How to enable Developer options on an Android Jellybean running Zen UI (done on my Asus Zenfone 5):

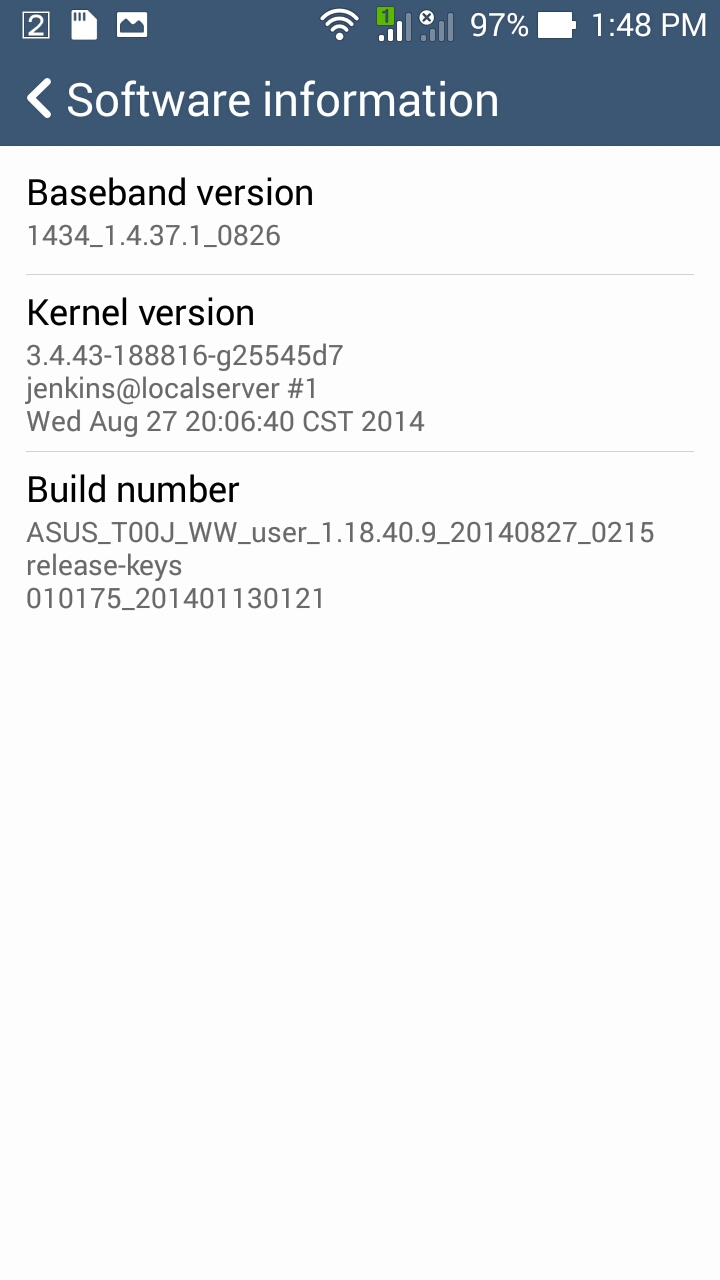
Go to Settings About phone

then go to Software information


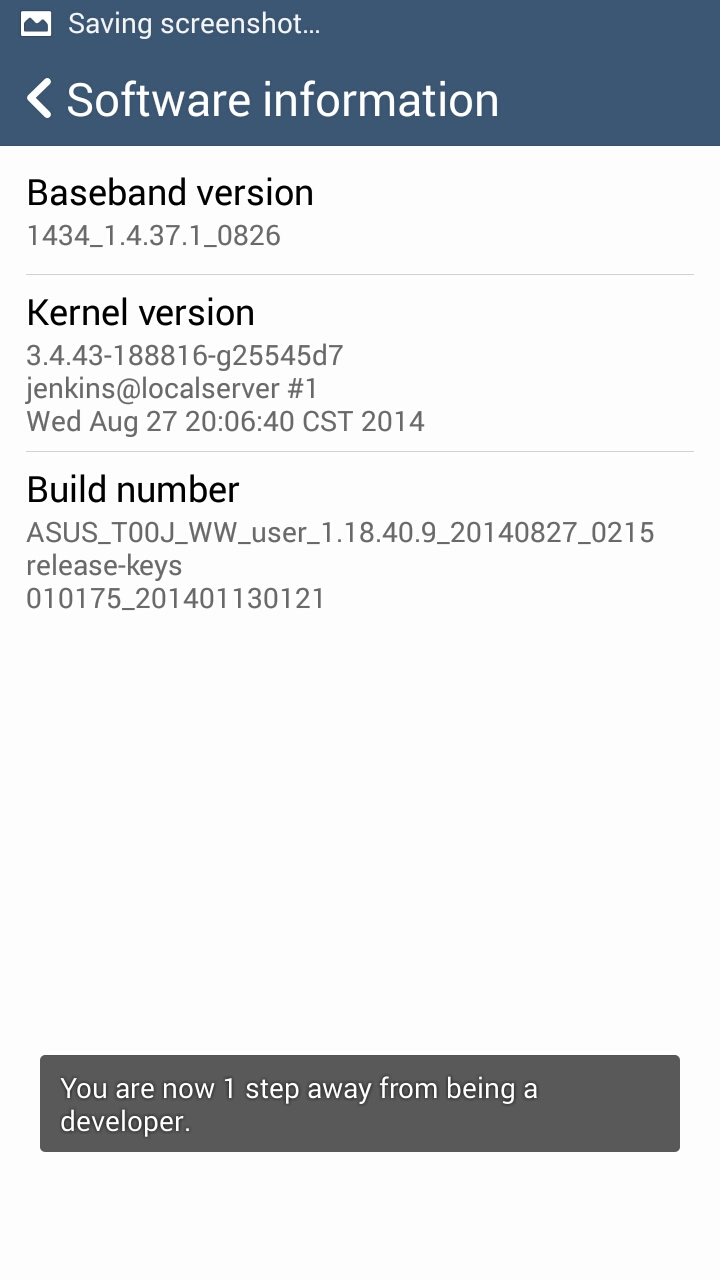
Click on Build number 7 times

Developer Options enabled!


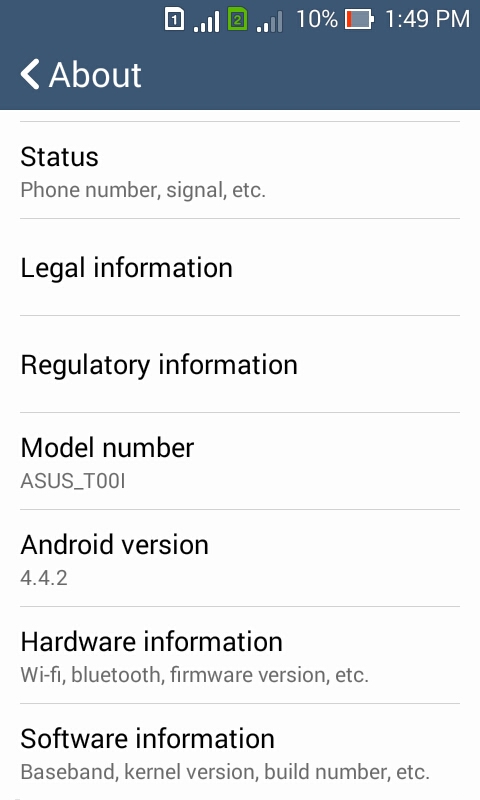
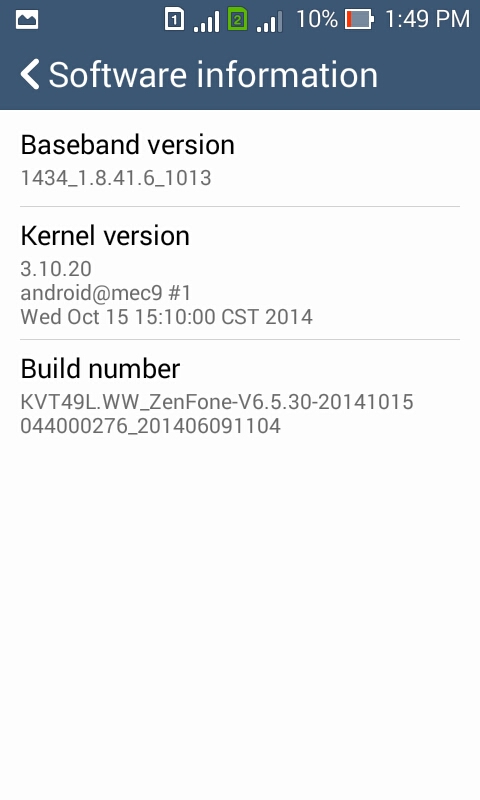
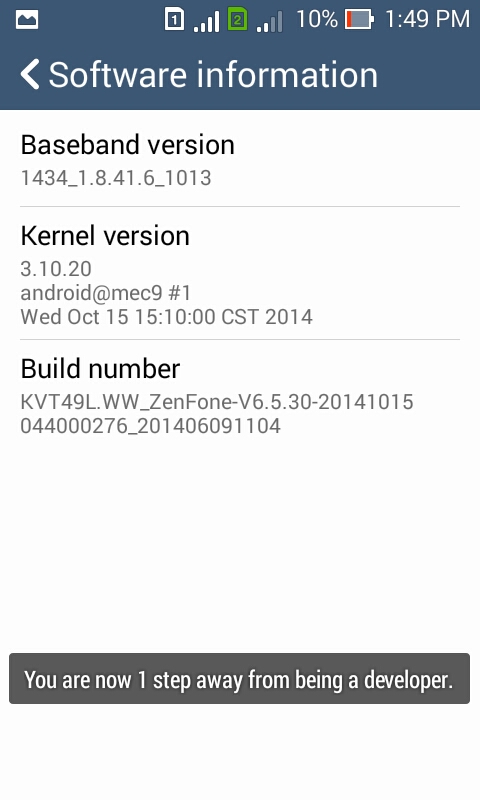
How to enable Developer options on an Android KitKat running Zen UI (done on my sister's Asus Zenfone 4):

Go to Settings > About Phone

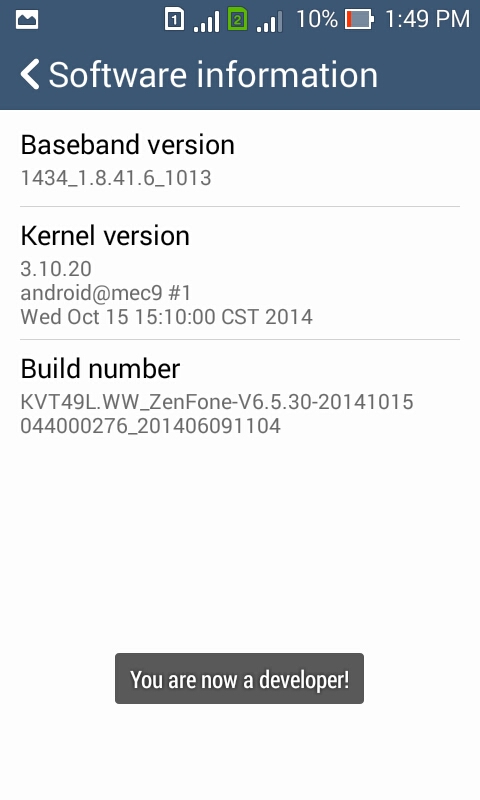
then go to Software information


Click on Build number 7 times

Developer Options enabled!

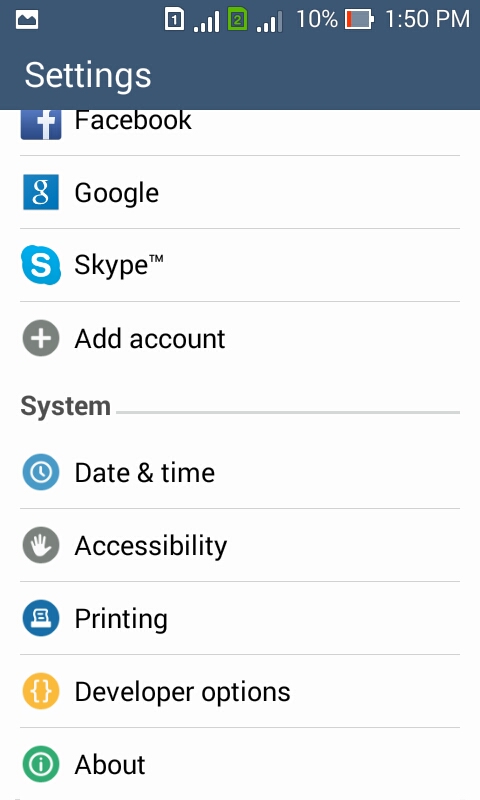
Developer options now visible under Settings > System

There you go! Procedure for other Androids 4.2 and above should be the same. You just navigate to where the Build number is displayed and click on it 7 times to enable Developer Options.

One of the most common features used under Developer Options is USB debugging. One reason to have it enabled is if you're looking into rooting your Android phone.

Interested in rooting your Asus Zenfone? Watch out for the tutorial soon!

Friday, February 21, 2014

How to Root the Cherry Mobile Flare HD

If you're not familiar with rooting then you probably have a few questions such as:

What is rooting


and

Why should I root my Android Device? 


Instead of answering these questions myself, I'm going to leave it to the pros:

9 Reasons to Root Your Android Device - Gizmodo
HOW TO ROOT YOUR ANDROID PHONE OR TABLET - Digital Trends
Top 10 Reasons to Root Your Android Phone - Lifehacker
6 benefits of rooting your Android phone or tablet -Android Authority

That's about as noob-friendly as this post would get. Apologies for that! For those who aren't confused yet... here we go:

Rooting History

I'm no stranger to rooting. I've rooted my first Android Phone, the Cherry Mobile Nova, and another Android tablet before their warranties even expired. The CM Nova came with Android 2.2 Froyo but through rooting I was able to install Cyanogen MOD, a custom kernel, and upgrade my phone to Android 2.3 Gingerbread!


My CM Nova's About Phone 
ROM Manager Installed
Superuser and Termina Emulator Installed
I've tried 2 methods of rooting my phone. One is with SUTLR, a computer program, and Z4Root which was a one click root app. Both worked as intended but Z4Root was definitely easier to use. Back then Boston Mania, was my main resource for Commtiva Z71 (CM NOVA) ROMs.

Flare HD Rooting

Thanks to this thread at the Symbianize forums. I was able to join a Facebook group: Cherry Mobile Flare HD UNITED. It's a Closed Group so you would have to send a request first. And thanks to them, I discovered Framaroot, an up-to-date one click rooting app. (Z4Root's last update was back in 2010!)


!! Important !!
Please be informed that rooting voids your warranty. If you did not install custom ROMs or custom Kernels, and did not uninstall stock apps, unrooting your device can possibly unvoid your warranty. Also, Catnippy will not be responsible if your device gets bricked. To avoid this, please read and follow the instructions carefully.


Please continue at your own risk! Catnippy will not be responsible for any damage caused directly or indirectly by rooting your device.

Framaroot is easy to use! According to the thread:


Installation
  1. Download it on your device (links are available at the end of this post)
  1. Install it with a file explorer or directly from your internet browser, if android warn you about security risk, say OK and check Unknown sources to allow install of applications outside of Play Store.

Usage
Open Framaroot and select one of the following action: Install SuperSU, Unroot or Execute script (for advanced users)


I chose 'Boromir' to root my CM Flare HD.
You can also Unroot your device using Framaroot
Option to execute script for advanced users

The rooting process didn't even take a min! You choose 'Install SuperSU' and then choose an exploit from the list (Why do they call it exploit? Does anyone know? It makes it sound so dangerous to use!). I chose Boromir as suggested by the users from the Cherry Mobile Flare HD UNITED group and it worked as intended. Within seconds, I saw a dialog box instructing me to reboot the device to finish the installation. Apologies for not having a screenshot of that. My bad because I pressed OK by instinct and totally forgot to take a screenie!


Before and After Rooting

For the next screenshots, I used Simple Root Checker (self-explanatory that one).

Simple Root Checker
Before Root
After Rooting
Please take note that only SuperSU will be automatically installed by Framaroot. After rooting, I installed ROM Toolbox PRO and used that app to install Busybox

TIP: Make it a habit to backup your ROM! Do it after rooting. Do it after you before/after you install root apps. Do it before/after you apply changes. Do it often, and make sure to have backups of your backups!

When I tried to backup my ROM, I had trouble with the stock recovery. When you boot into Recovery Mode, you use the volume rocker to navigate up/down, the menu button to select an option, and the power button to display/hide the menu. Since the Flare HD does not have a Menu Button, I found it impossible to backup. (If you know how using the stock recovery, please comment below!) TWRP's Recovery Mode has a touchscreen interface! That solves the problem for Android phones that have no Menu Button. I installed TWRP using Mobile Uncle. An .img file of TWRP compiled for the Flare HD is available in the Files section of the Cherry Mobile Flare HD UNITED group.

Flare HD rooted! What now?

Now you can install root only apps! There are non-root apps that are able to customize your Android. However, root apps provide greater customization. Below is a screencap of root apps I've installed so far (save Play Store and Settings).


BusyBox combines tiny versions of many common UNIX utilities into a single small executable. It provides replacements for most of the utilities you usually find in GNU fileutils, shellutils, etc.
A one-click application to install Superuser and su binary on phone.
Control device with MULTITOUCH and MULTITASK gestures similar to iPad. Works in all applications. You can even hide status bar and enjoy full screen in your favorite games or while browsing.
A complex Xposed module targeted for devices running Android 4.1/4.2/4.3, which turns vanilla ROM into feature-packed "non-flashing" custom ROM.
Greenify help you identify and put the misbehaving apps into hibernation when you are not using them, to stop them from lagging your device and leeching the battery, in an unique way! They can do nothing without explicit launch by you or other apps, while still preserving full functionality when running in foreground, similar to iOS apps!
Also, Greenify has a non-root version available now!
ROM Toolbox combines apps like Titanium Backup, ROM Manager, Root Explorer, SetCPU, Ad Blocker, MetaMorph, Autorun Manager, Terminal Emulator, Script Manager, SD Booster, BuildProp Editor, Font Installer, Boot Animation Installer & many more apps into an all-in-one app! 
Record great quality screencasts directly from your phone or tablet!
Screencast captures your phone screen at high frame rates into a high quality MPEG4 video with audio. It can also take snapshots of your screen by holding the search key on your phone.
  • SuperSU
SuperSU allows for advanced management of Superuser access rights for all the apps on your device that need root.
Xposed is a framework for modules that can change the behavior of the system and apps without touching any APKs.
Screenshots of Gravity Box tweaks:
Customized my QuickSettings using GravityBox
Customized my Battery Indicator using GravityBox
Remember Technoclast's video review of the Flare HD that I linked last time? Rooting fixed the Home Button! If you're using the default Launcher, pressing the Home Button will now send you back to your Home Screen. Whereas before rooting, if an app was open pressing the Home Button only sends you back to the Launcher. Not necessarily your Home Screen.

There you have it! A rooted Flare HD. I'm still tinkering with it. I don't think I'll be installing a custom ROM or custom kernel anytime soon. If a Cyanogen MOD comes along, I might consider it for sure!

Is your device rooted? What method did you use? What root apps do you have installed? Tell me about it! Comment below!
P.S.


Do you like my theme? Watch out for the app review!