Nuffnang Leaderboard AD

Sunday, March 08, 2015

How you can #MakeMiraclesHappen - Pantene 3-Minute Miracle Review

#PanteneMiracle

When I went to the mall last week with my sister, I didn't plan on coming home with Pantene's newest product: the Pantene Pro-V 3 Minute Miracle Conditioner (Total Damage Care 10). My sister bought one and told me about the rave reviews she has read online. Curious, I grabbed one and added it to our cart.

I also didn't plan to write a review about it, but after Day 1 of using the product I just had to share my #PanteneMiracle! My only regret now is not taking before pictures. Here's how to #MakeMiraclesHappen for you:

Directions:After shampoo, apply onto damp hair. Rinse off thoroughly. Recommended for daily use.
As you can see, the directions is no different than that of other conditioners. Day 1 was definitely a treat. Compared to my non-conditioned hair, it definitely looks shinier, and feels silkier and smoother. Compared to other conditioners I've tried, I can honestly say that the 3 Minute Miracle Conditioner is the best I have used so far. However, since I don't have the means to test my hair, I couldn't tell if 3 months worth of hair damage was indeed 'cured' after just one treatment. So I decided to use the product for 7 days before writing a review.

Full disclosure though, I am self-employed and I work from home so my hair is not as exposed to the sun and pollution. Half of my hair however, is color-treated so I do have some hair damage. (Read about it HERE.) For the purpose of this test, I rinsed the conditioner off exactly 3 minutes after application. And used the conditioner for 7 days.

AFTER PICTURES

Indoor shots under artificial light, with and without flash


Here's indoor shots under artificial light of my sister's bleached and colored hair, with and without flash


Outdoor shots under natural light


All pictures were taken around 5 hours after using the conditioner. This is also after being out for the afternoon, and riding a jeepney (and I know y'all know how that goes sometimes #WhipIt).

VERDICT

What I liked

The scent
- If you prefer subtle scented hair products, this is the conditioner for you! It has a fruity berry scent with a hint of vanilla.

A small amount of product goes long way
- While it's tempting to put more product in your hair in hopes of getting better results, this is actually not necessary to achieve the #PanteneMiracle.

Easy to rinse off
- This is a important for me since I refuse to support hair products that requires liters of water just to rinse it out. (Save Water, Shower Together!)

Silky shiny smooth hair with volume
- This is why my sister loves this product. Other conditioners she has tried leave her hair either silky, shiny or smooth, sometimes a combination of the three, but there's always a lack of volume. Conditioners tend to weigh down her hair too much, and as someone with thin hair, that limp hair look doesn't flatter her at all. Pantene's 3 Minute Miracle Conditioner feels like it's made for asian hair. It gives fine hair (whether you have thick hair like me, or thin hair like my sister's) that silky, shiny look that is smooth to the touch plus volume that lasts throughout the day!

What I didn't like

Hard to find
- While this wasn't an issue for us, it seems to be a problem for others. Customers are buying the product by the bulk so stores do get out of stock. Personally, my sister and I bought ours at the supermarket of Robinsons Antipolo.

Price
- The Total Damage Care 10 variant is on sale for 79.50 Php at the Robinsons Antipolo supermarket. The Watsons in the same mall sells it for 80.xx Php. The other variants retail for around 159.00 Php on Zalora. So why is this a CON? Because I'm simply wishing the price for this variant would never go up!

Buy Again?

Definitely! Though I am probably going for try the other variants of the 3 Minute Miracle Conditioner first before deciding which one I'll use as my everyday conditioner.

What's your #Pantene Miracle? Share your story below!

Sunday, March 01, 2015

Fruit Yogurt Dessert Maker Review + Lazada (Sold by Amphorae) Review

Fruit Yogurt Dessert Maker
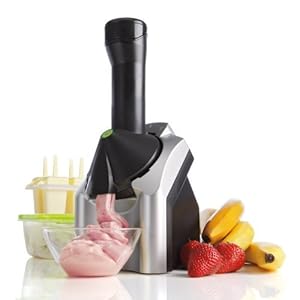
I ordered an (Imported) Fruit Yogurt Dessert Maker B1 at a discount at Lazada. It's an AS SEEN ON TV product. Well, at least I thought it would be the generic version of Yonanas since it doesn't say "Yonanas" on the ad.

What is Yonanas?


Yonanas is a fun new kitchen appliance that makes delicious, creamy, low-cost, healthy frozen treats that look & taste like soft serve ice-cream using ONLY frozen fruits!
[Source]

Check out their YT video:


I got introduced to 'healthy ice cream' a few years back. It was called 'vegan ice cream' and typically used only one ingredient: bananas! There's a few tutorials out there right now. Check out The Kitchn's How to Make Creamy Ice Cream with Just One Ingredient! You can either use a blender or a food processor. Then came Yonanas, which seems easier to clean, and is definitely more child-friendly to operate since the blades aren't exposed.

What you need:

  1. Frozen fruit/s
Yes, technically you only need fruit/s to make a healthy ice cream! For Yonanas, the recommended base is overripe bananas. According to the website, 'cheetah spots' are a sign that the bananas are overripe. The more spots, the sweeter the bananas. You can of course create your own recipe and find out what is yummiest for you.

The plan:

Strawberry Banana Yonanas


TIP: Le sis wanted to try out making healthy ice cream this weekend. I initially looked for ripe bananas, but some grocery stores sell overripe bananas like pictured above.


Too bad I didn't know my friend went to Benguet last weekend. I could have asked her to buy strawberries for cheaper!

If you noticed, I used cling wrap to separate the fruits so they won't stick together after they've frozen. It shouldn't be a problem tho if you decide to thaw the fruits first before putting them in the machine.

I also bought avocadoes and planned on buying ripe mangoes for an mango-avocado sorbet.

The Fruit Yogurt Dessert Maker

Front

Add caption

Side

Back

It turns out that the product is not a generic fruit yogurt dessert maker, but a knockoff. Yonauas it says on the packaging. But that's not the part about this product sold by Amphorae on Lazada you should worry about.


What's in the box?


Cracked face
I removed the black chute to examine the machine and this is what I saw!

Cracked bottom
As soon as I picked this part up, the bottom panel fell out! Revealing the inside:


As you can see, some wires aren't even connected. I'm no electrician, but shouldn't that be hooked up to the motor? I called Lazada and asked about the return policy. Unfortunately, the 7 day return policy expired yesterday and the agent tells me that the product has no warranty. The agent was helpful though, and promised to coordinate with the seller about my concern.

On Lazada

While on the phone with the agent, I went to Lazada.com.ph and checked my order history. So that I could at least leave a review of the product if the seller does not take responsibility for this item. 

My Orders
Lazada fails in this regard. The listing doesn't even inform me who the seller is and where I can review the product I purchased. Good thing I was still on the line with the agent. She reminded me that the seller is Amphorae.

Seller Reviews and Ratings
If you look up a seller on Lazada, you can view their reviews and ratings, and rate the seller yourself. However, the page does not display the reviews for you to read.

The agent informed me that the product page is no longer listed, since it's out of stock. Lazada should keep these pages up. Why? Because customers have the right to leave reviews of the product and have it publicly available. Having it taken down like that defeats the purpose of customer reviews!


Lesson Learned

  • Check packages as soon as it is delivered!


I have been a Lazada customer since 2012, and I have never received a defective/damaged item until now. Even if you completely trust your seller, you should always check your package as soon as you receive it. 

The tuition fee for this lesson is: ₱ 907.99Probably chump change for some, but this fee was totally avoidable.

Overall

My tummy is quite disappointed. My body was ready to omnom on healthy ice cream! I shall not be deterred though! I plan on going to the grocery tomorrow to buy some Greek Yogurt and try making healthy ice cream using a blender. If all goes well, maybe I'll blog about that instead. 

Update: 03/08/2015

Unfortunately, here's a snip of the email I received from Lazada 2 days ago:

Dear Acar,
We would like to inform you that as per coordination to our concern group item has been reported beyond the return policy for the order 303455227.
Item Name: (IMPORTED) Fruit Yogurt Dessert Maker B1
Our apology for this has been causing you.

I guess that's it then. I'll have to find a way to rate the seller and hopefully my review will serve as a warning for other customers.

Do you have (authentic) Yonanas? Is it worth the investment? Or do you make healthy ice cream another way? Share your story below!

Friday, January 16, 2015

The Brow Studio - A Brow Design Ensogo voucher Review

Ensogo [Source]

I've been a regular customer of Ensogo Philippines and other group buying sites. So far, my experiences have been positive. I've received authentic products in good condition, and have been able to claim service vouchers/coupons without hidden charges.

Last year, I bought The Brow Studio
Package from Ensogo at 50% for only 349 PHP. I've been putting it off for a few months now, but the voucher expires at the end of this month so I decided to bite the bullet!

The Brow Studio [Source]
Vouchers usually require customers to make reservations and set appointments. This is the same for The Brow Studio voucher from Ensogo. I called the Shopwise Araneta branch last Jan 11th to schedule an appointment for Jan 14th. All The Brow Studio contact info can be found on their About section of their Facebook Page. Unfortunately, no one was answering their phone. So I sent them an email, and posted on their Fb wall.

They replied to my comment within the day, and helped me set an appointment. The email was answered after 2 days. I would suggest contacting them via Facebook if you can't contact them via phone.
I arrived at the Shopwise Araneta branch after 12 noon. I gave them a printed copy of my Ensogo voucher, and filled out a log sheet. While waiting I took 2 pics:

The Brow Studio Flyer

The Brow Studio couches
The service I purchased is for Brow Design which the Ensogo page describes as:
  • Brow Design is the process of assessing, reshaping and discovering the perfect arch for your facial features.

I make it a point to do a bit of research before I purchase products and services. Needless to say, I've read a few The Brow Studio reviews. Three of the blogs I've read mentioned the Brow Rx [1][2][3]. It's a mock up of a doctor's prescription sheet, only it's for eyebrows! It's used by The Brow Studio designer as a guide to show the client the eyebrow shape that best compliments their facial features. It also has info about brow prescription and reminders.

I am unsure if the other blog reviews just excluded the Brow Rx or if they weren't given one at all. In my case, after the brow designer was finished setting up, she asked me to sit on the couch without giving me a Brow Rx. I must admit I expected her to at least ask me if I'm familiar with the procedure, and then explain what shape she's going for.

BEFORE

Before she started though, I asked her to help me take Before photos:

Before

Before

Before
Look at those caterpillars! I let them grow out for a few weeks for a more dramatic result. 

Threading

While it was my first threading experience, I have tried plucking my eyebrows before. How does it feel? Threading feels like plucking a few strands at a time! Whenever I pluck my eyebrows, I can't help but cry. It's not that the pain is intolerable, it's just how I my body reacts. I apologized to the brow designer, and her response was to crack jokes that made me a lot more comfortable ("Tiis ganda ma'am!).

I also thought when you get your eyebrows threaded you'll just sit there and enjoy endure the procedure. Turns out, sometimes client participation is needed! I was asked to lift my eyebrows and pull down the corner of my eye a little bit. Heh. Things you learn! 

My brow designer provided feedback during the threading. She told me that my eyebrows look thick because I had long and thick strands. The strands are spaced apart that she can't trim it much or it would end up looking patchy.


AFTER

After

After
Don't be alarmed by the redness and the swelling. It's normal. Other reviewers experienced it too (in varying degrees). Mine's probably the "worst" I've seen, but that's because I have sensitive skin. The redness went away after 3 hours.

Before I left, I asked them about the my sessions of Brow Clean-up. My brow designer said I can come in every 2 weeks. I now have a record with them so I don't need to provide another copy of the voucher.

Ensogo has been selling The Brow Studio vouchers since 2013. If you're looking for an excuse to try The Brow Studio, follow Ensogo and watch out for another voucher sale. Then again, the Brow Design's regular price is 328 PHP. You can always come in and have that done, then just maintain your brows yourself. It's worth the money!

I'm already looking forward to  my next visit. I'm hoping the next sessions wouldn't make me cry as much! Have you tried The Brow Studio's services? Where do you get your eyebrows done? Tell me about it below!

The Brow Studio
2nd Flr. Bridgeway
Shopwise Araneta Cubao Q.C.
Mobile: (+63) 932 866 3224
Facebook
Email

Friday, January 09, 2015

How to Root Asus Zenfone 5 running Android Jellybean 4.3 without a computer

Keep Calm and Root Your Android!
Hi! I'm back and here's the tutorial I promised since November of last year! This is actually my second rooting tutorial. I talked about rooting, why you should root your phone, and my Android rooting history in my first tutorial. I also suggested root apps in that blog entry. If you're new to rooting, please read those sections first! Click HERE.

!! Important !!
Please be informed that rooting voids your warranty. If you did not install custom ROMs or custom Kernels, and did not uninstall stock apps, unrooting your device can possibly unvoid your warranty. Also, Catnippy will not be responsible if your device gets bricked. To avoid this, please read and follow the instructions carefully.


Please continue at your own risk! Catnippy will not be responsible for any damage caused directly or indirectly by rooting your device.

STEPS:

1) Download the lastest RootZenFone app from the Asus Zenfone Blog.

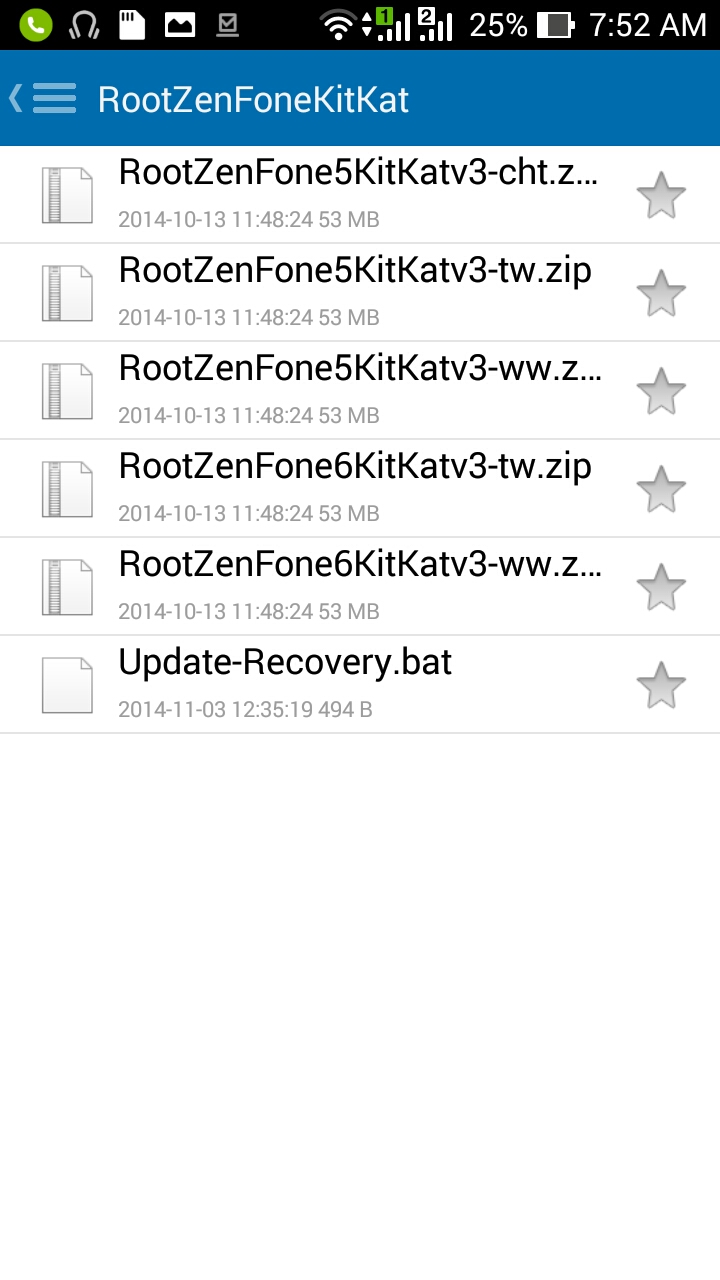
2) Locate the file on your phone and extract the correct RootZenFone5 apk file according to the firmware version your ZF5 is running.


Extract the correct apk file 

How to check the firmware version of your Asus Zenfone 5 
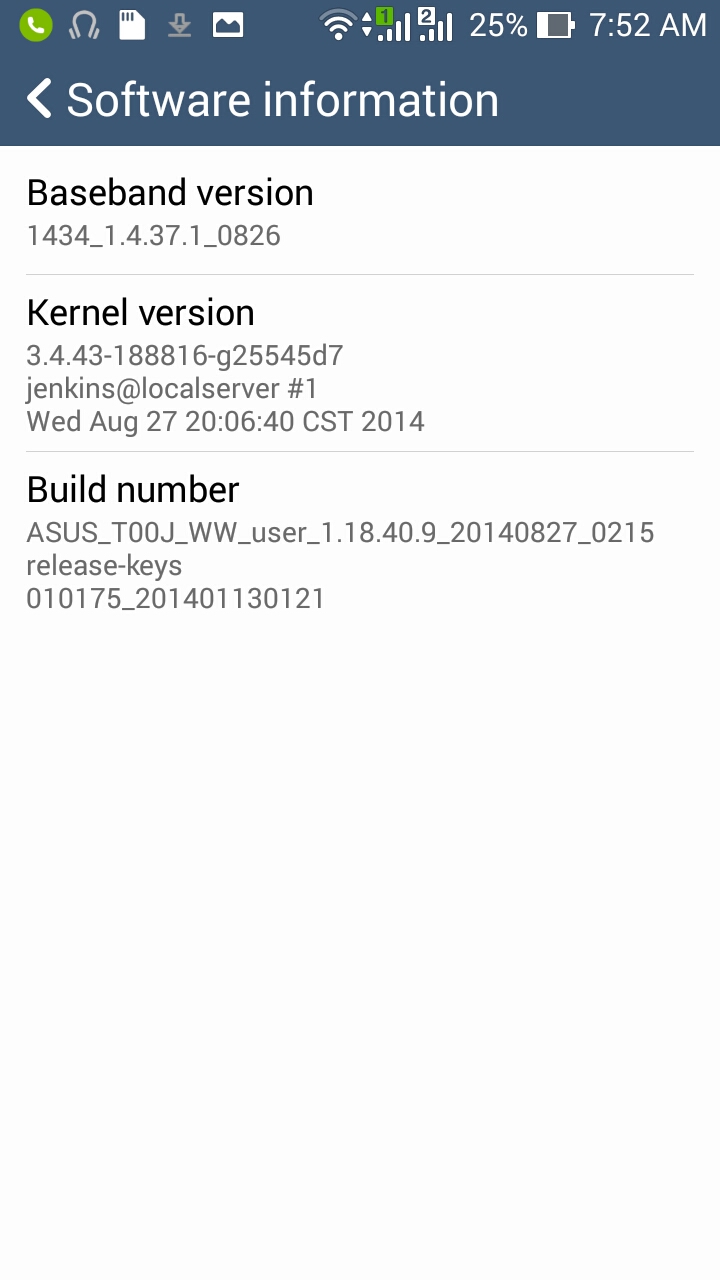
  1. Go to Settings > About > Software information
  2. Under Build number, you will see which firmware version your ZF5 is running. It will be either CHT, TW, or WW.
Go to Settings > About > Software information

3) Install apk file.


Install Root ZenFone

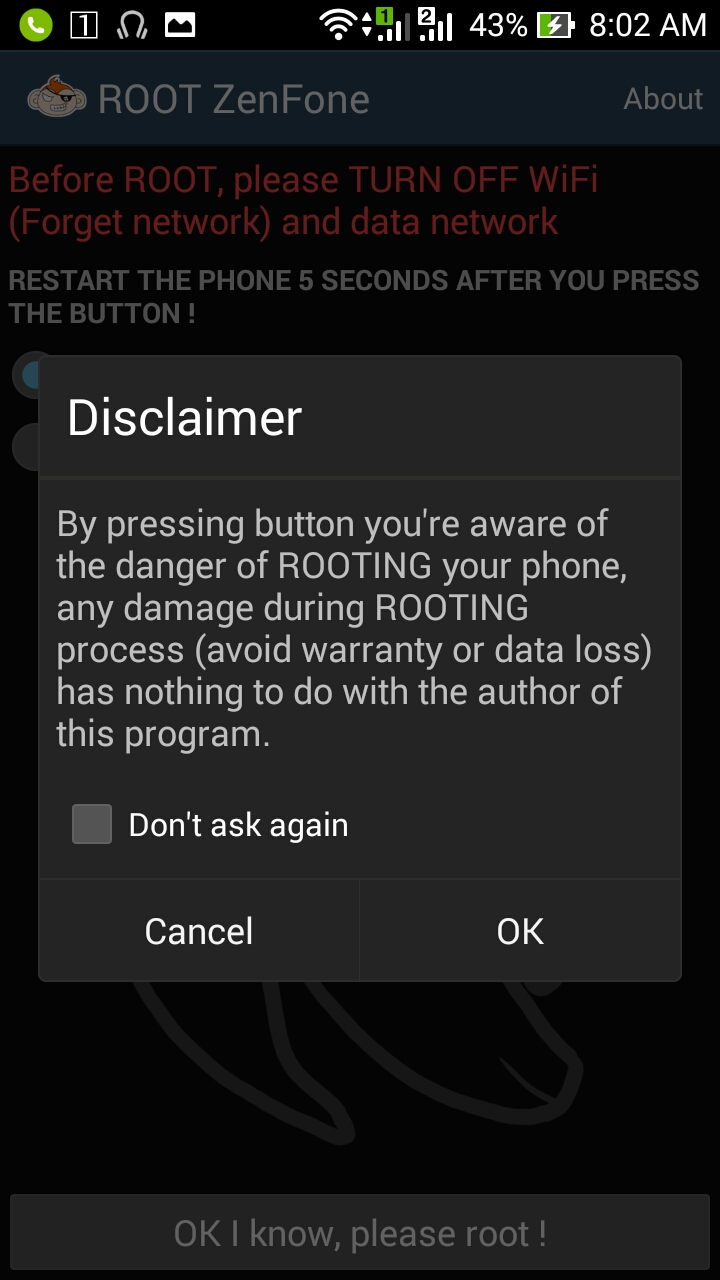
Disclaimer

Before we continue, what happens if you don't TURN OFF Wi-Fi and data network? Since I was feeling a little bold. I did it so you, my dear readers, don't have to!

!! CAUTION !!

Do not try this at home!

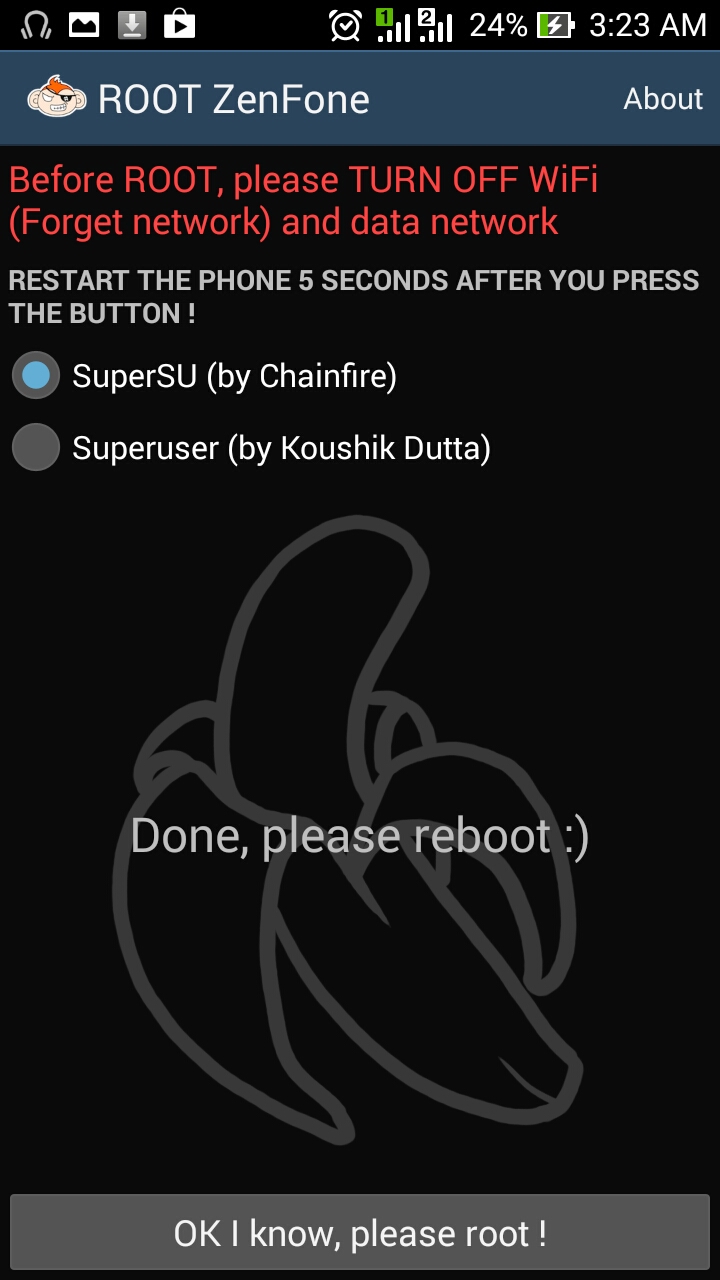
If you press "OK" without turning off your internet connection, the phone opens a page that provides you with information about the Asus Zenfone 5. While this is far from harmful, it does hinder the app from rooting your phone. So remember to turn off your internet connection to proceed with the root! 

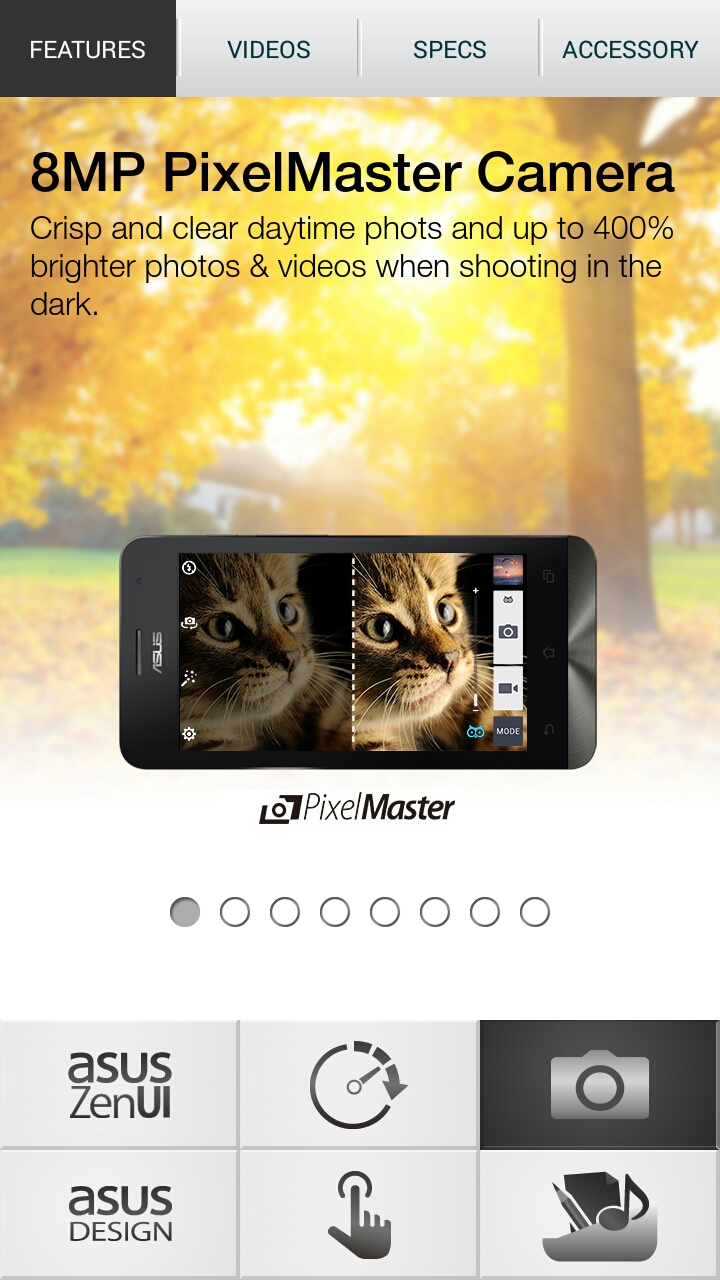
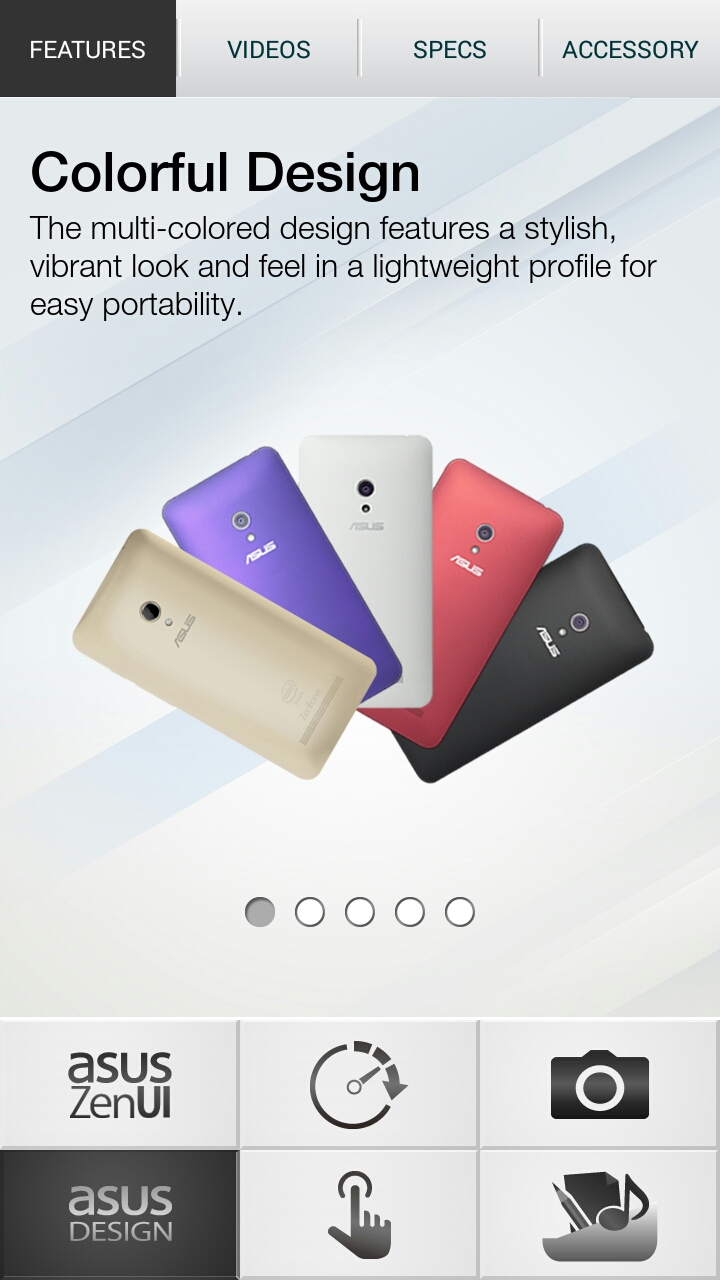
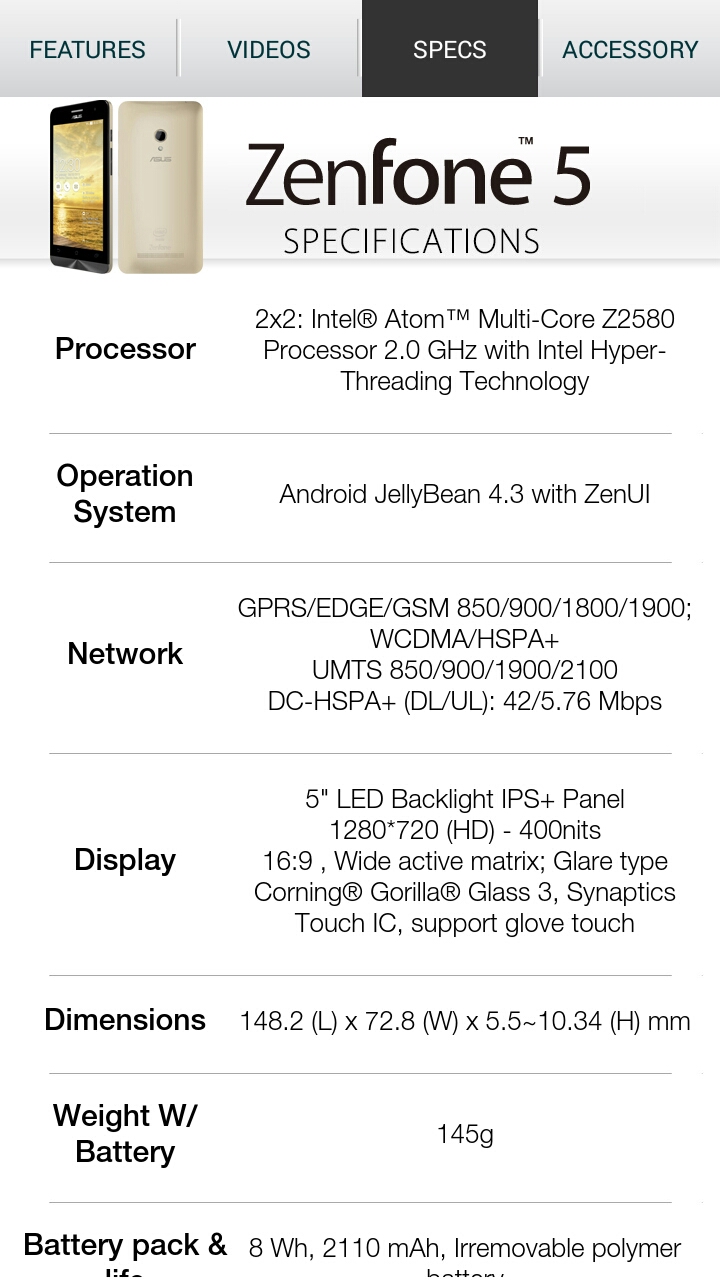
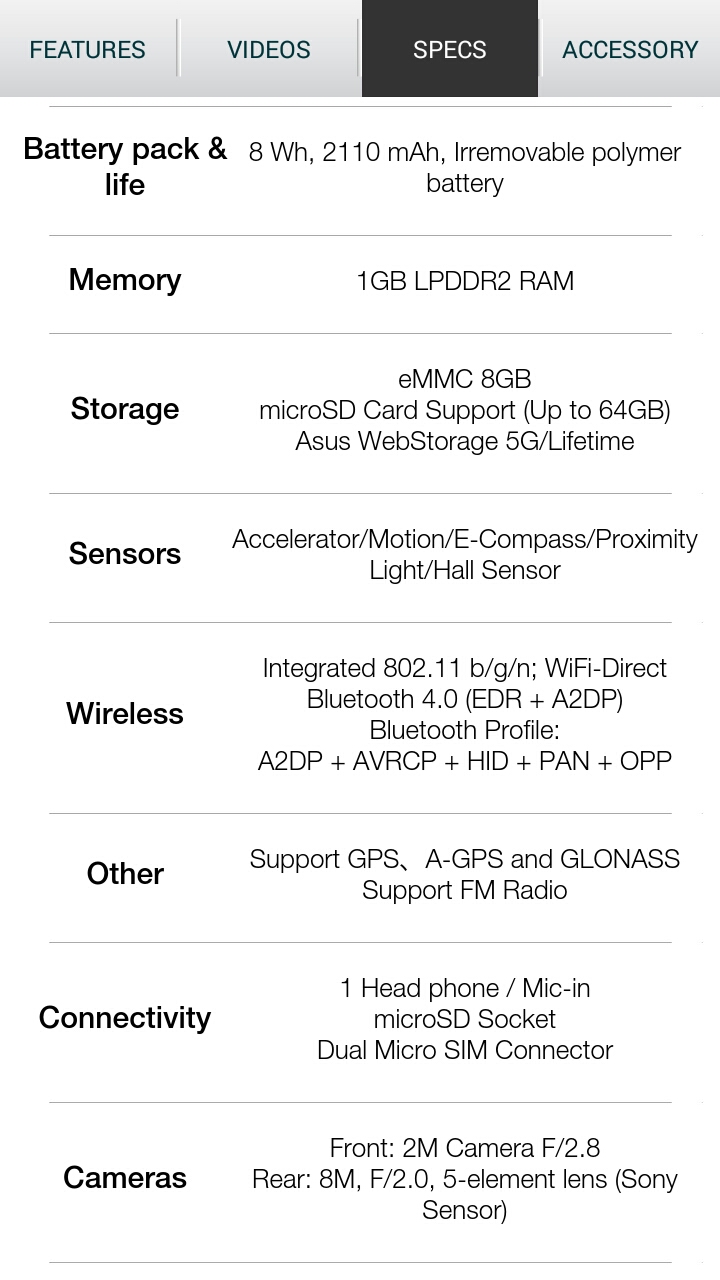
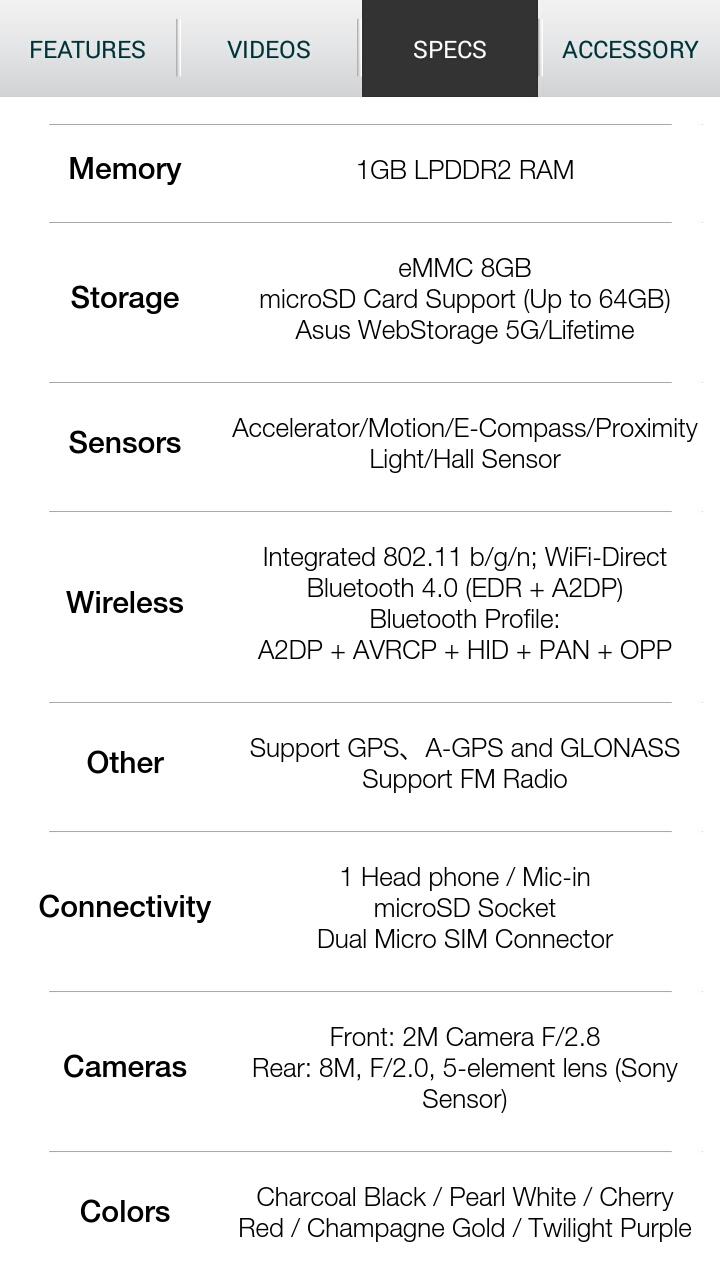
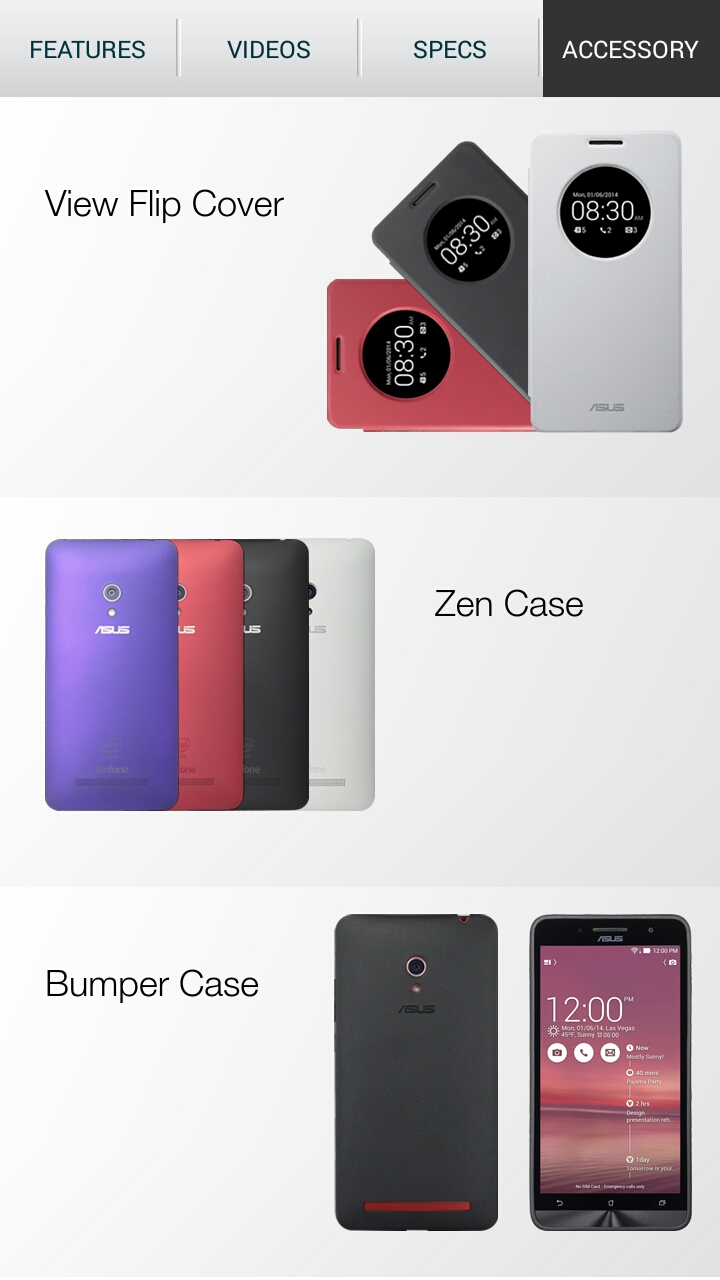
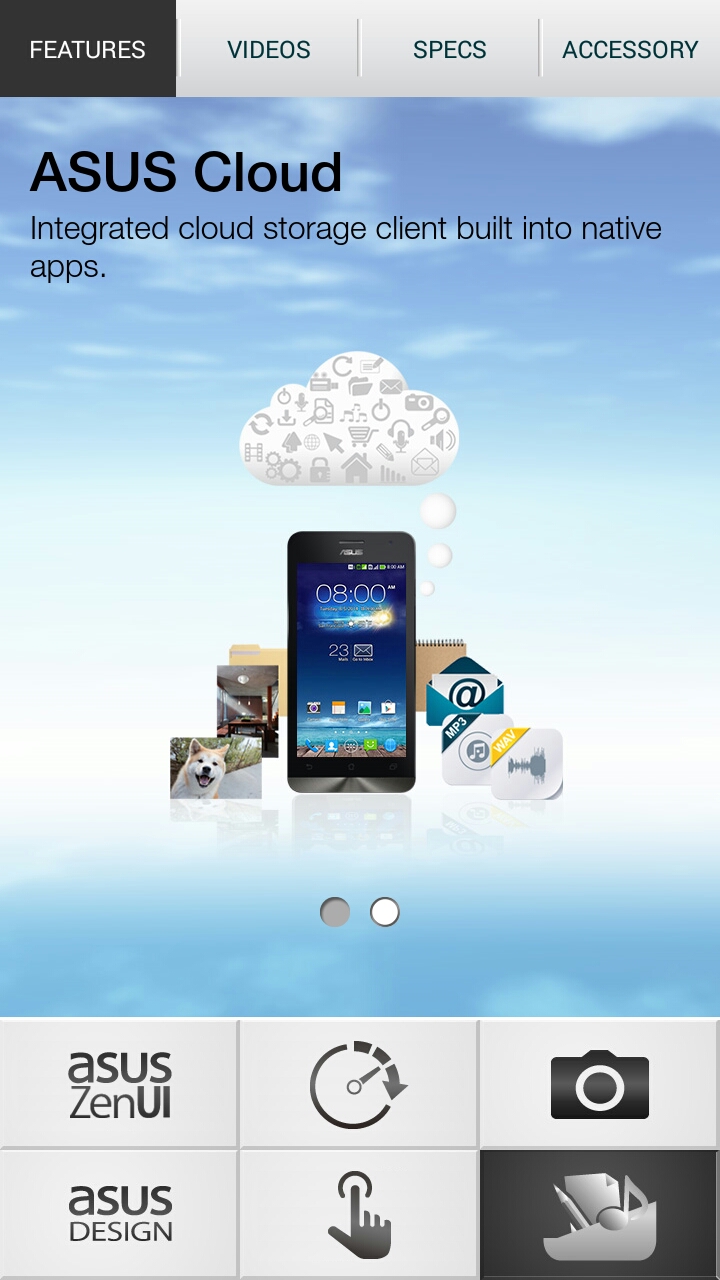
Since we're already here, Asus Zenfone 5 Features and Specs:

Zenfone 5

Features

Processor

Camera

Design

GloveTouch

Asus Cloud

Videos

Specs

Specs continued

Specs continued some more!

Accessories

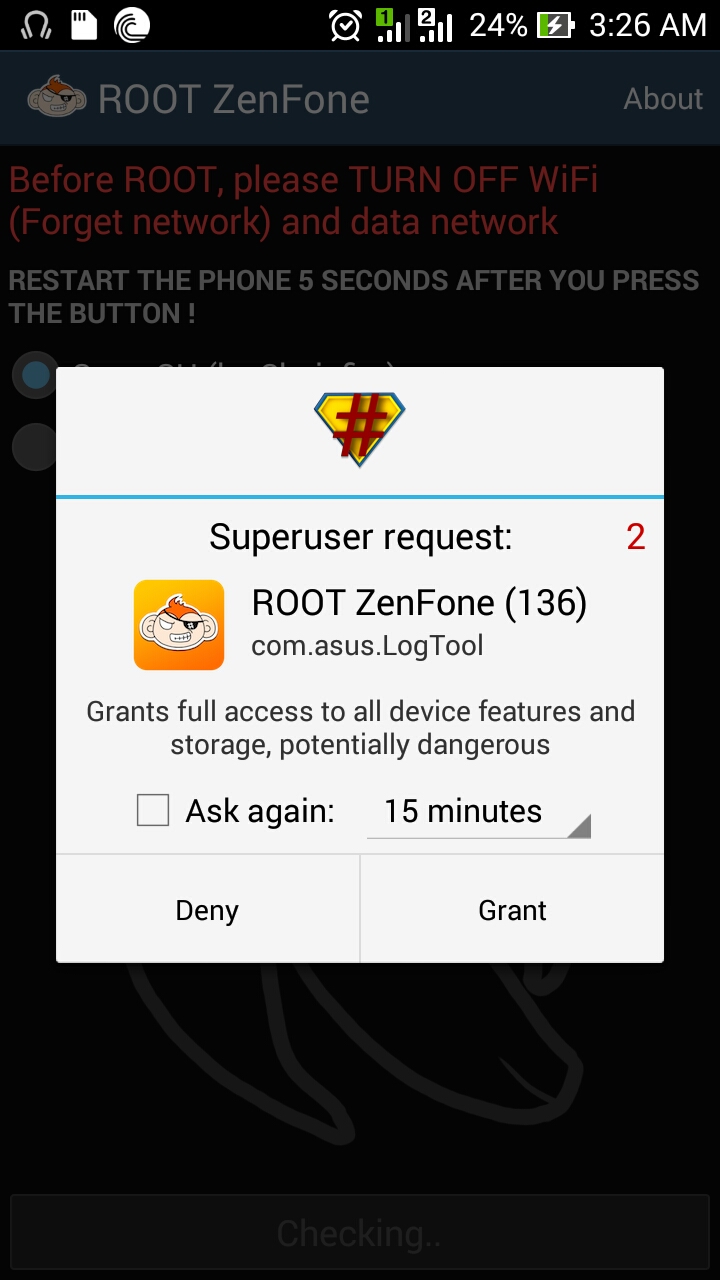
To continue with rooting your ZF5, turn off your internet connection and click "OK".

Reboot phone after rooting

Choose "Grant"
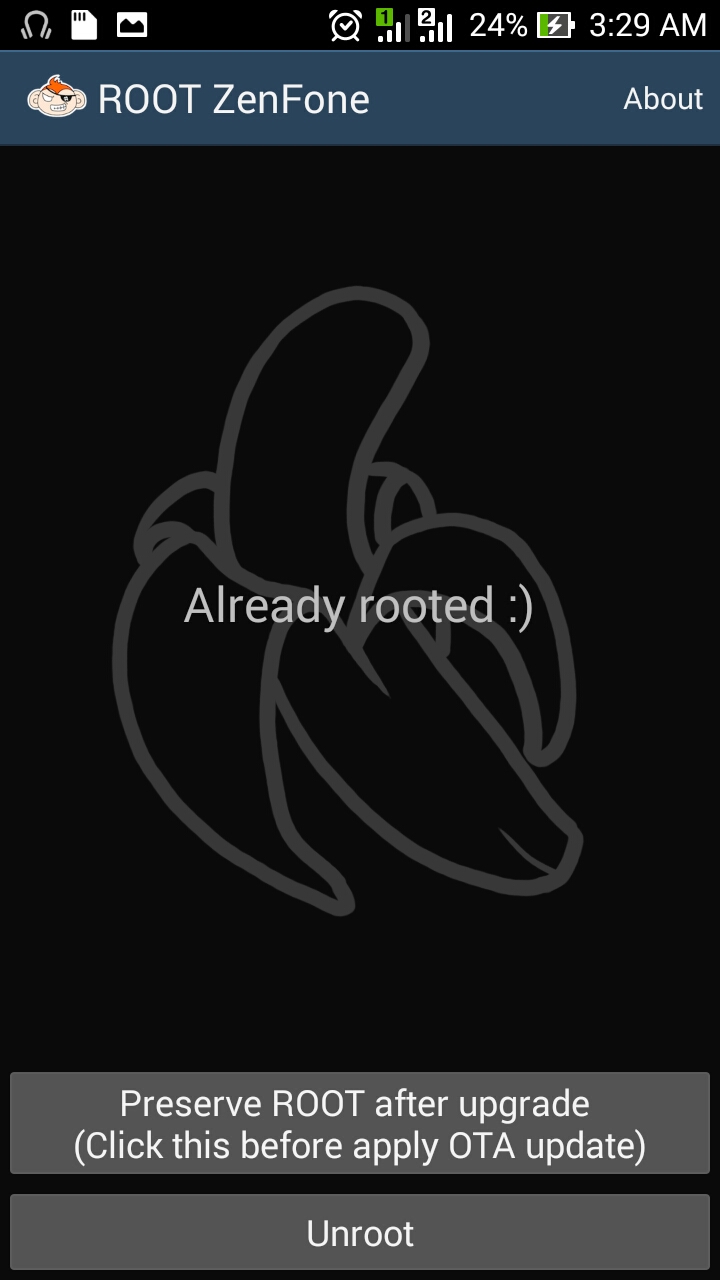
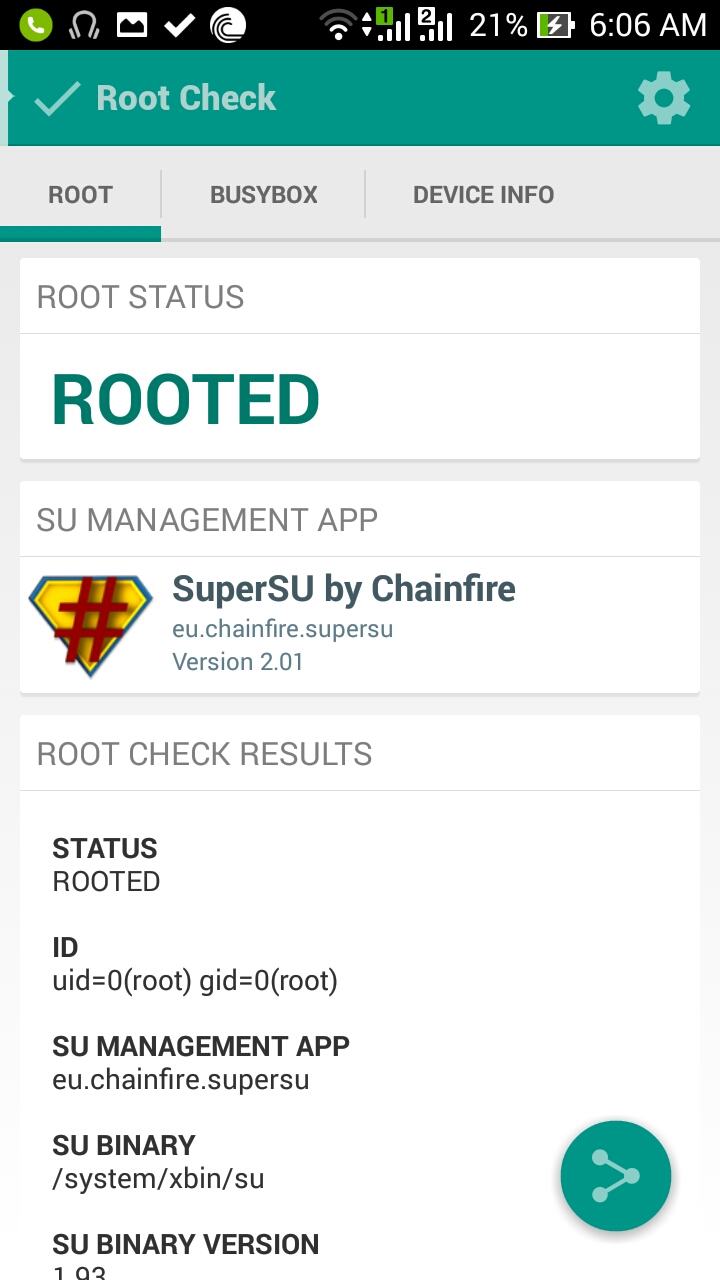
After rebooting, when you launch the Root ZenFone app again, it will confirm if the root was successful:

Already rooted!

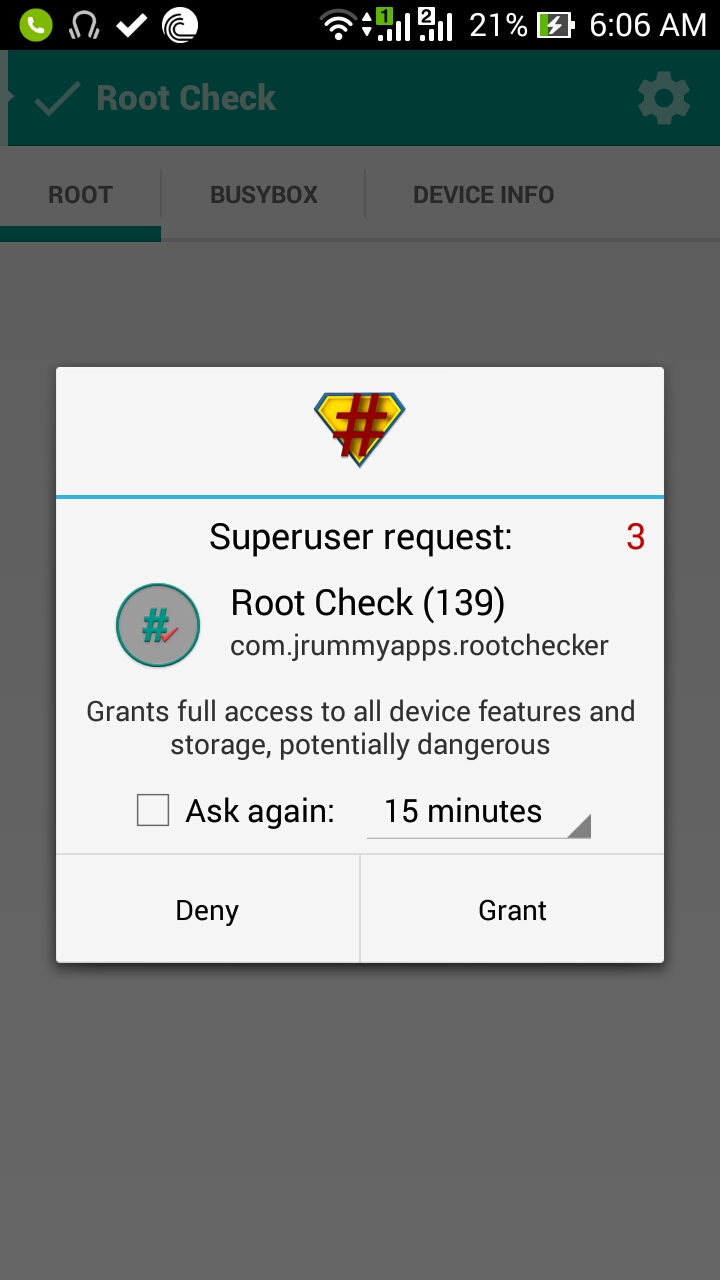
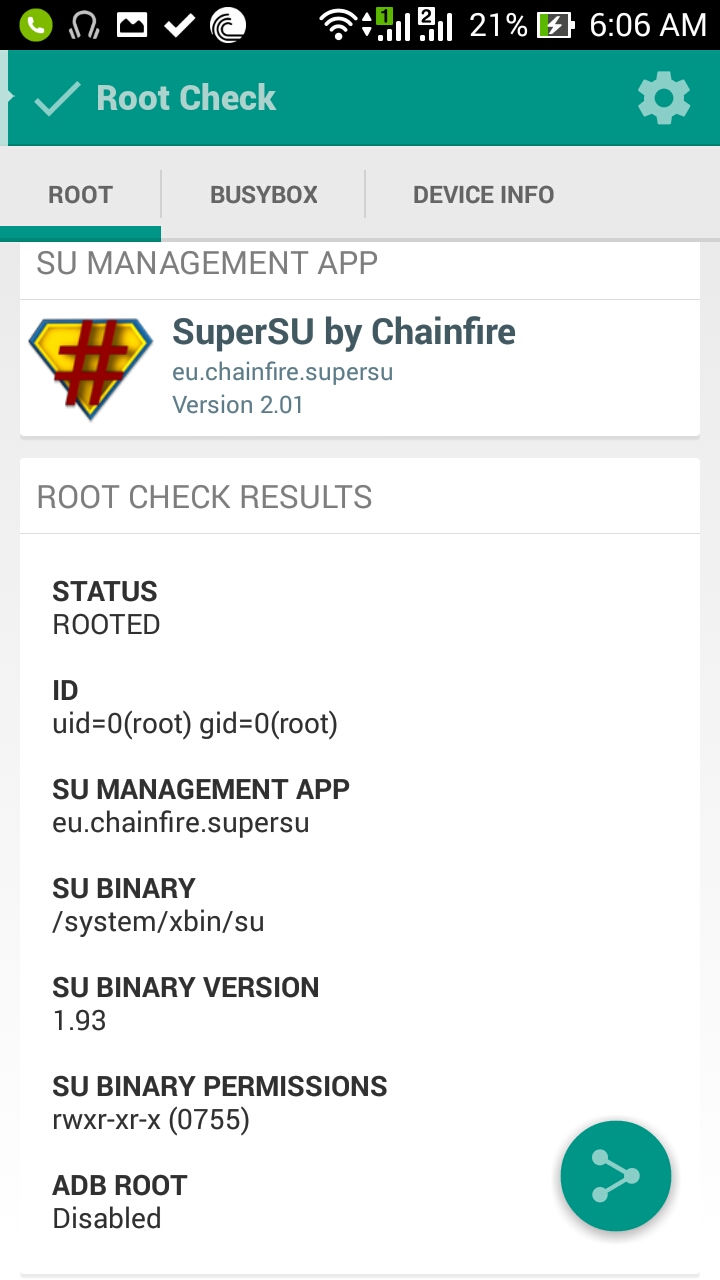
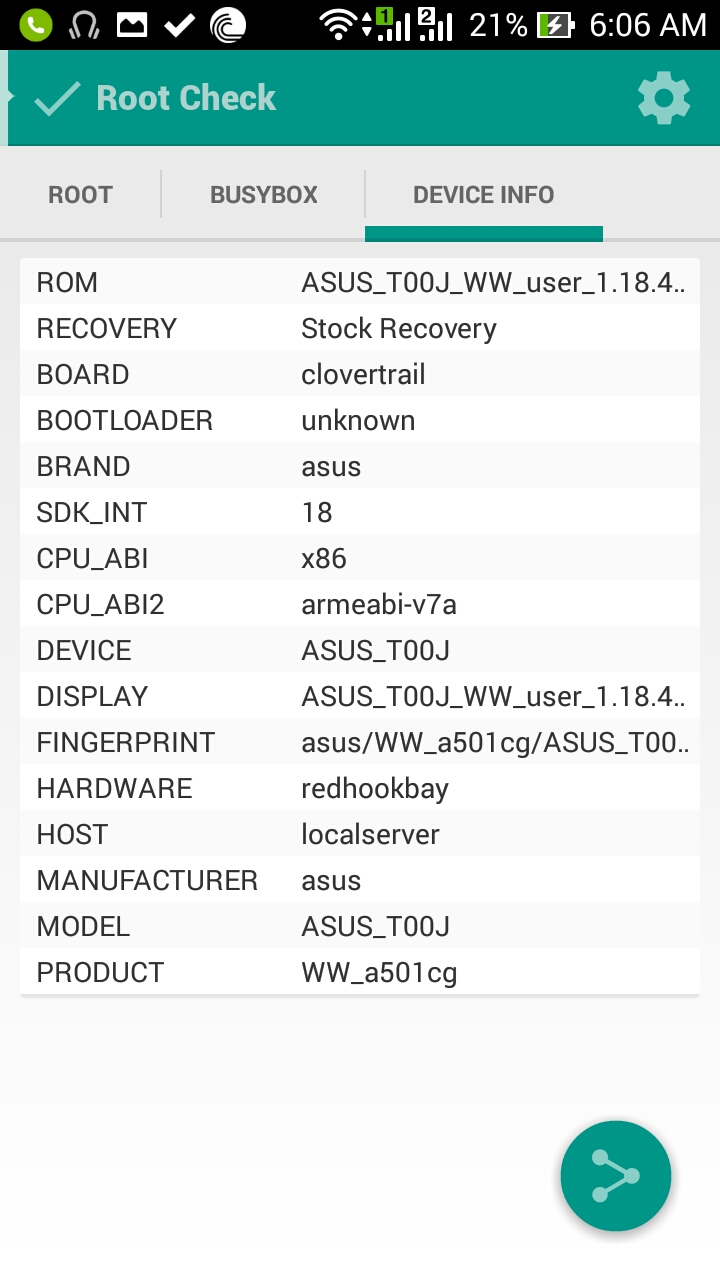
If for some reason you want to double check if your ZF5 is Rooted. Install Root Check:

Choose "Grant"

Root Info

Device Info

Root Status

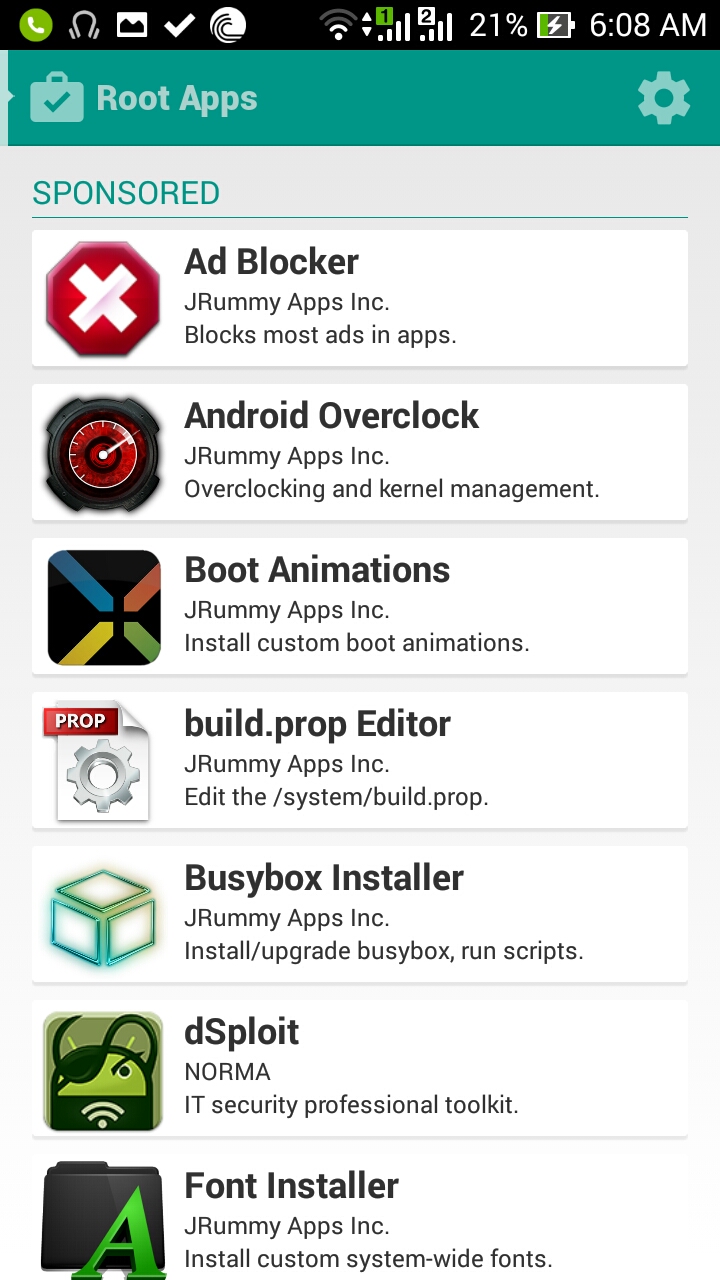
Root Check suggested Root apps

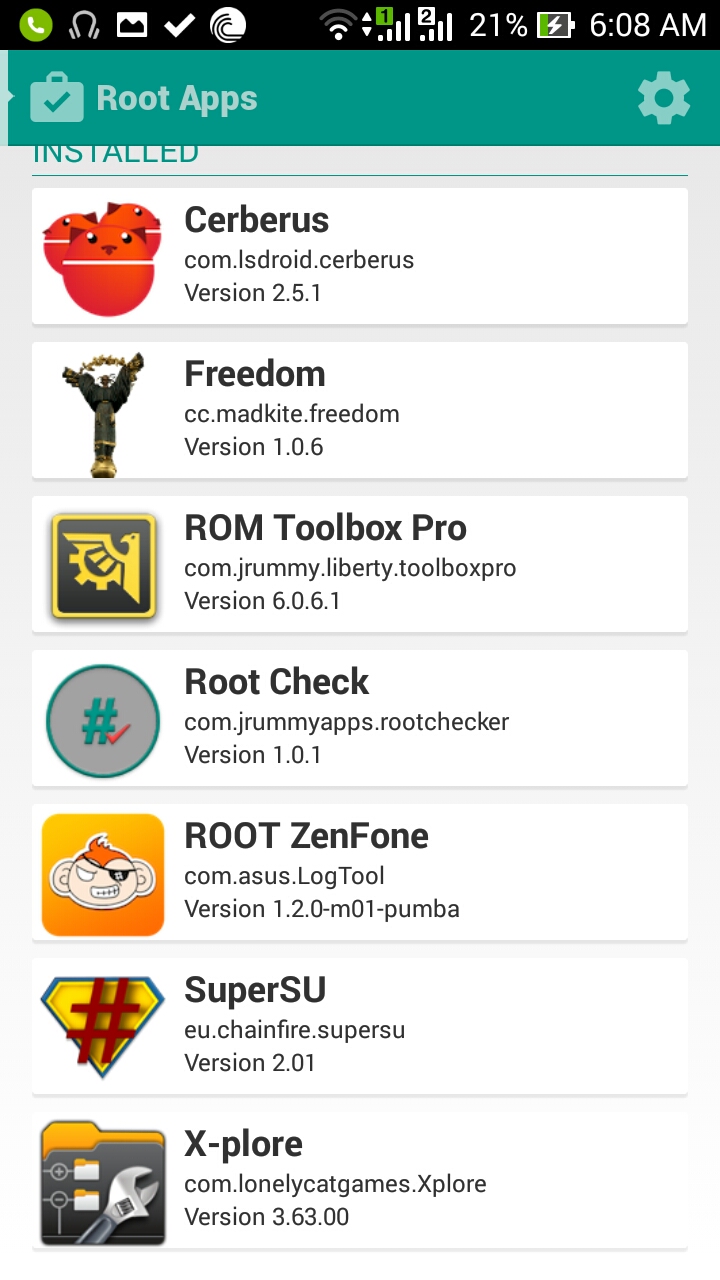
Root Apps will show all root apps currently installed on your device
Congratulations~! You now have a rooted Asus Zenfone 5! Look at you! Rooting an Android device without using a computer! (If you had to, we can keep it our little secret...) 

!! Important !!

The Asus Zenfone 5 I bought was still running Android Jellybean. But the KitKat 4.4 OTA update was already available. If you followed this guide to root your ZF5 JB and you apply the OTA update after, it will download all available updates and upgrade your ZF5 to KK and you will lose root access!

Want to know how to update your Asus Zenfone 5 Jellybean to Kitkat and preserve your root access? Watch out for the tutorial!

Is it too late for me to do an Asus Zenfone 5 review? Comment below!